Judah's Birth Story

I was told throughout my pregnancy that third babies are wild cards, as are their labors, and this was definitely true for me. I anticipated that my labor was either going to be very quick (like under 3 hours) or it was going to be difficult and long since my first two labors were relatively quick in comparison to some. Well it turns out that this labor was quite different from my first two and challenged me mentally. I had been having Braxton Hicks contractions for many weeks, probably since 34 weeks or so. Some days there was a lot of tightening and others not as much. I did notice the more I picked up my kids, or the more stressed I was, they were more frequent. Besides those practice contractions, there were two nights that I felt like I could have been in early labor. I had woken up, feeling very off and had a lot of cramping. I was in and out of the bathroom a few times, but come morning nothing had accumulated and I wasn’t having real contractions either day. With Raelynn I definitely had prodromal labor the three days prior to her birth so I thought maybe it was the start of that, but nope life proceeded as normal and I felt better after 24 hours both instances. Since both Elijah and Raelynn came “early”, 4 days and 6 days respectively, I was sure this third baby would come early as well. He did in fact, come early but only by 3 days.

On Friday, May 19th we had some friends over for a playdate and lunch. I was rinsing some dishes off and noticed a slight twinge followed by what felt like a bulb of warm liquid coming out of me. I thought, well surely that was my water breaking so I hurried to the bathroom and sure enough it was way more liquid than just discharge. When I sat down it kept coming out and I couldn’t stop it, which I knew was a sign that it was indeed my amniotic fluid and not urine. I told my friend what had happened and that I needed a few minutes to change. At this point, I was feeling totally normal. There was no tightening, pain of any kind, or contractions. To me, I knew something was off. Normally, your water should break during a contraction or for me the previous two labors my water didn’t break until I was pushing. I later found out that I was experiencing premature rupture of membranes (PROM): the rupture of gestational membranes prior to the onset of labor. Since I wasn’t experiencing contractions, I wasn’t super eager to call my husband, but I also knew since I was giving birth in a hospital they likely had a policy for the length of time I could labor before the baby was born due to higher chances of infection. I ended up calling him to let him know what had happened. I later found out that my midwives weren’t as strict as OBs are, but they “preferred” the baby be born within 24 hours.

My water broke at 12:10pm and the first early stages of contractions didn’t start until 1:30pm or so. The contractions were very sporadic in length and frequency throughout the afternoon. I tried tracking them on an app, but soon realized it was pointless as they weren’t consistent nor increasing in pain. We have family dinner/movie night on Friday’s and my mom usually joins us. I called her and told her to pack her bag as she’d be staying the night after the movie since I knew we’d have to go to the hospital at some point in the next 12 hours. I made a simple dinner for us and while sitting and eating I noticed the contractions were a bit more painful so that gave me hope. I decided to go upstairs and rest while the rest of the family watched the movie. I was hoping to be able to better feel the baby move and also maybe fall asleep. I did feel more movement which was good and gave me reassurance. I had called my midwives a little after my husband came home and they told me I could stay home as long as I felt comfortable with but just to monitor for movement. My midwife mentioned that I could also come in at any point if that would make me feel more comfortable; since my water had broken I wouldn’t be allowed to go back home once I was there though. Knowing this, I knew I wanted to stay home as long as possible. 

I did our bedtime routine with Raelynn, which was extra special knowing things were about to change in a big way for both of us. After we got the kids to bed, I was feeling rather frustrated that my contractions were still inconsistent. This labor was really throwing me off mentally, and I was getting discouraged. I had started tracking my contractions again at dinner and they were roughly 8 minutes apart lasting for 1-1:30 minutes. But then when I was putting Raelynn to bed there were a few that were 6 and 4 minutes apart. Then they went back to 20 minutes apart for an hour! I called my midwife again around 9pm and we decided I should try to sleep. Well, of course I couldn’t sleep so after an hour or so of tossing I went downstairs to do some of the labor prep stretches/movements I had been doing for two weeks prior. I also walked a lot on our main floor to help encourage progress. I had noticed when I laid down my contractions were less frequent and weaker. In my mind, I had decided that we’d go in regardless of how I felt around 12am as that was 12 hours past my water breaking. I was eager to hear the baby’s heartbeat, but not eager to be stuck at the hospital. I called around 11:30pm and let the midwife know we would be on our way and that I’d prefer a room with a birthing tub if possible.

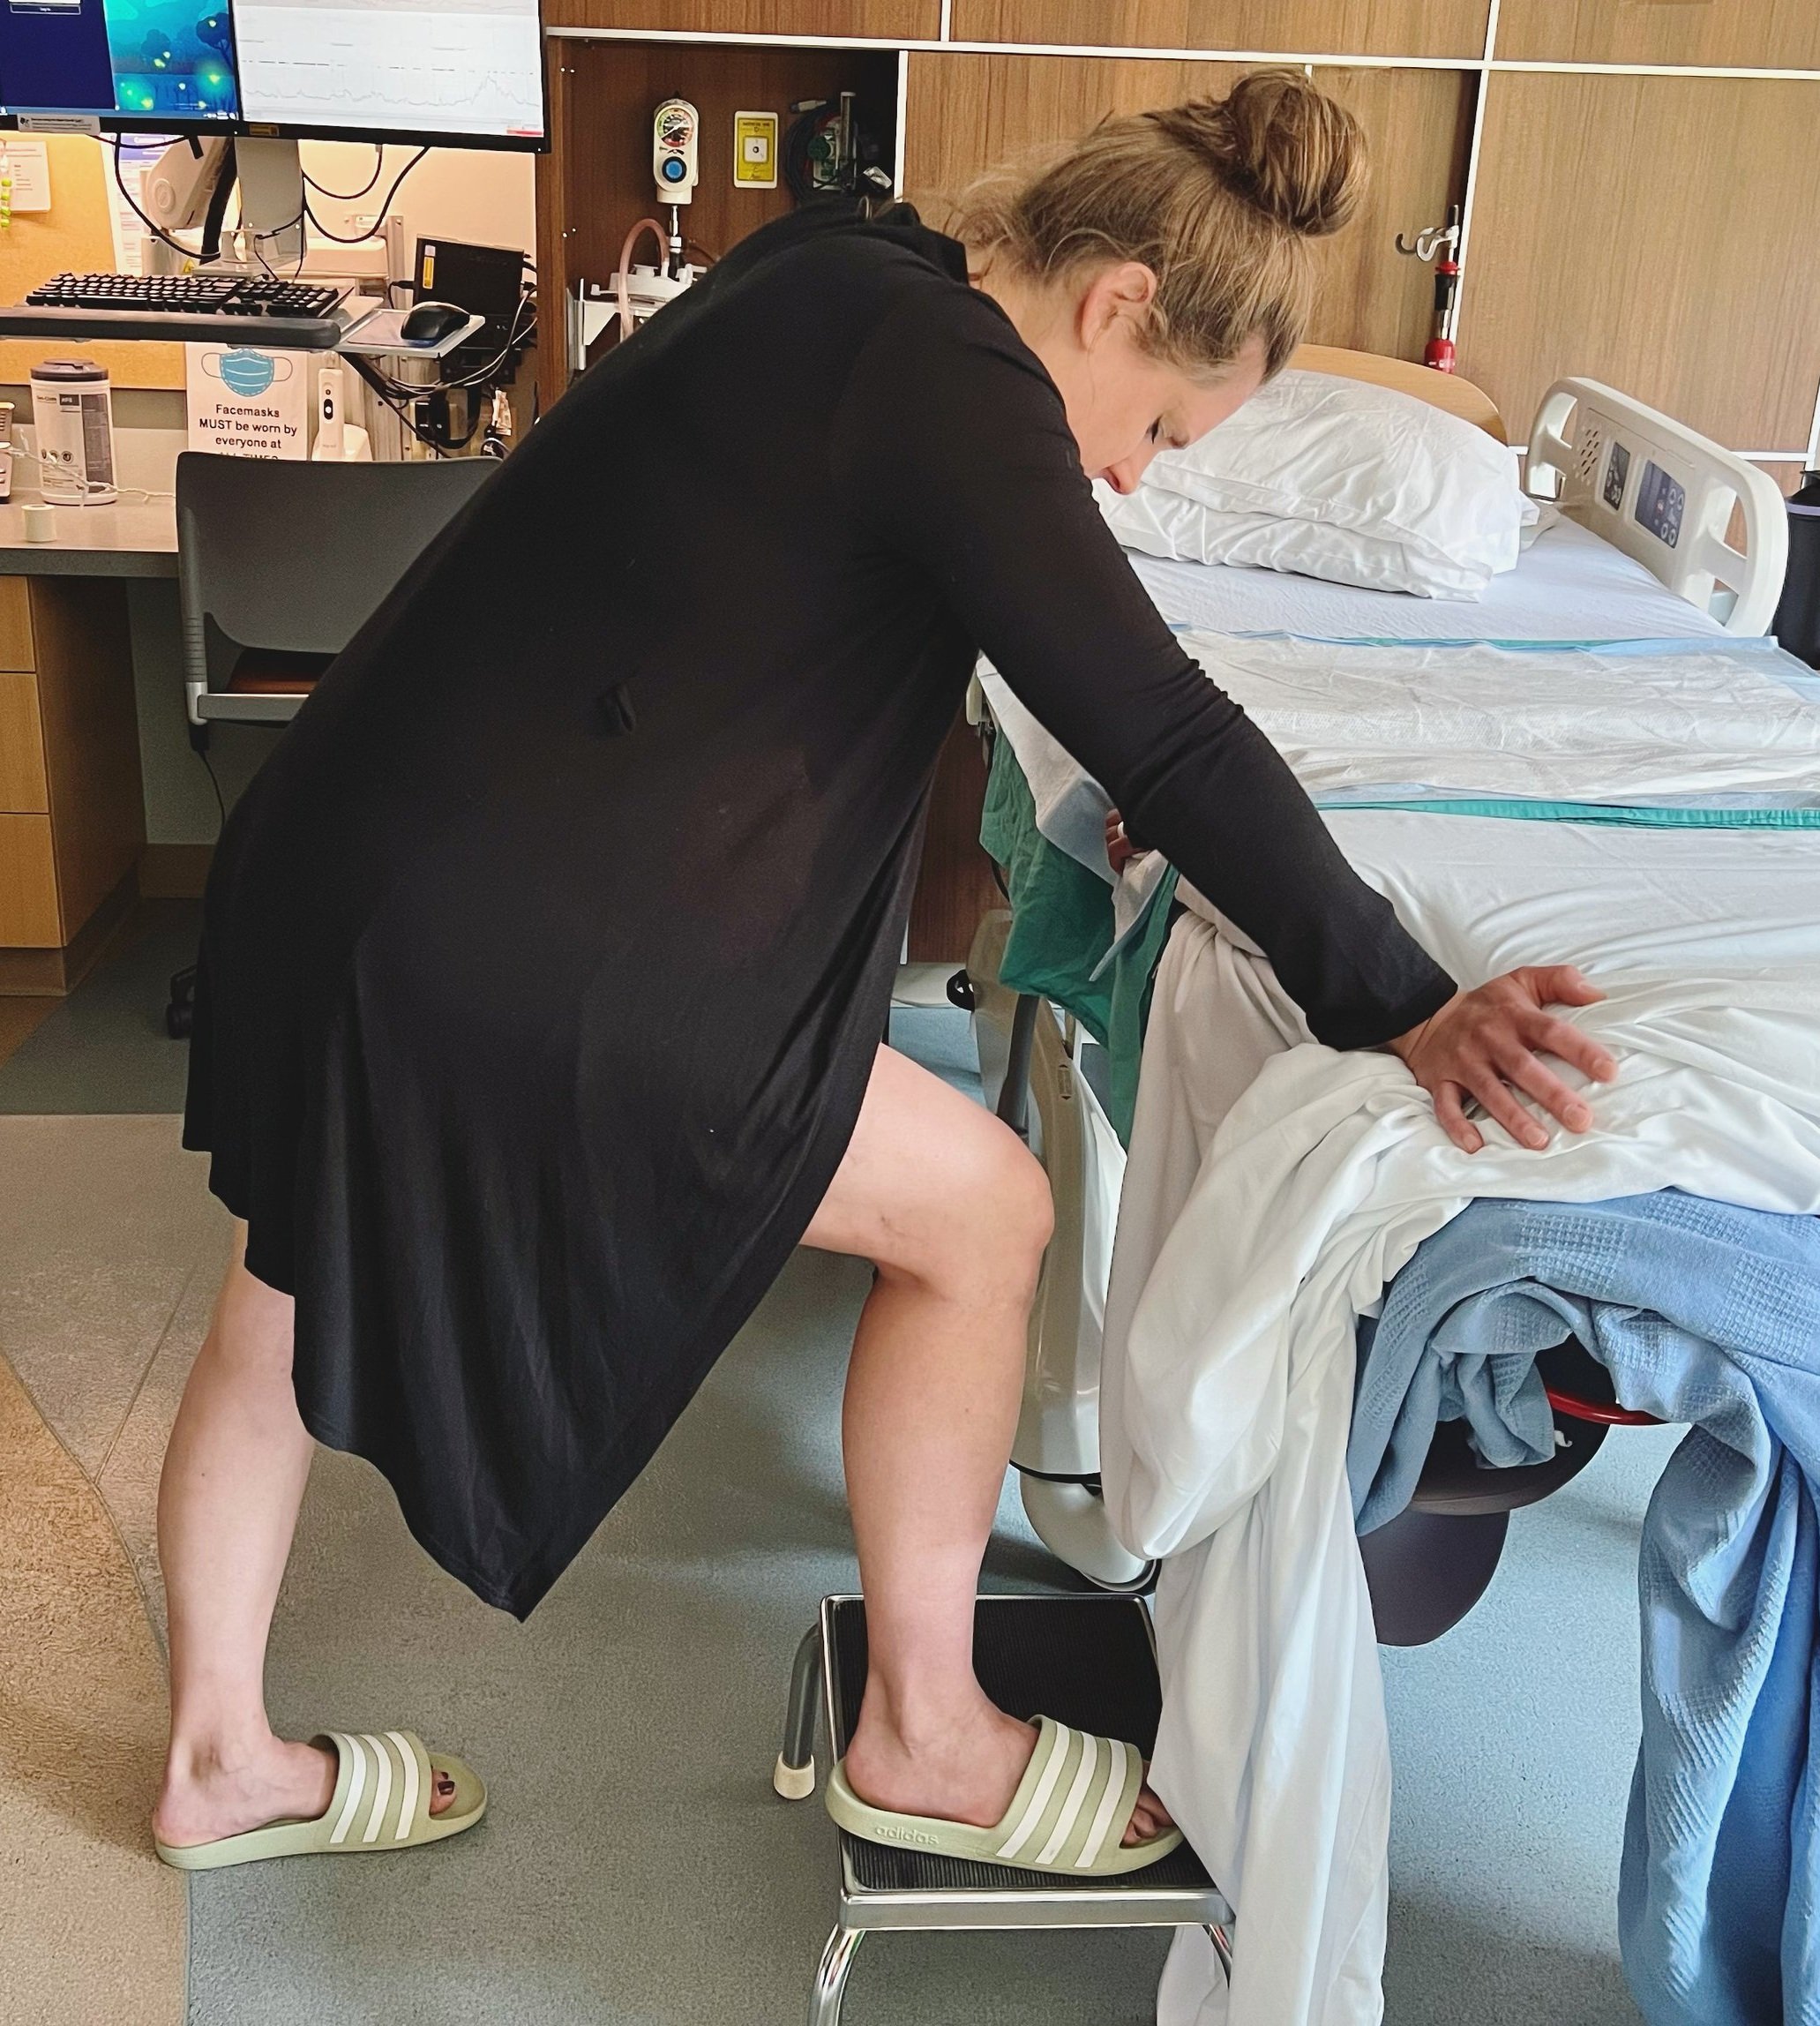
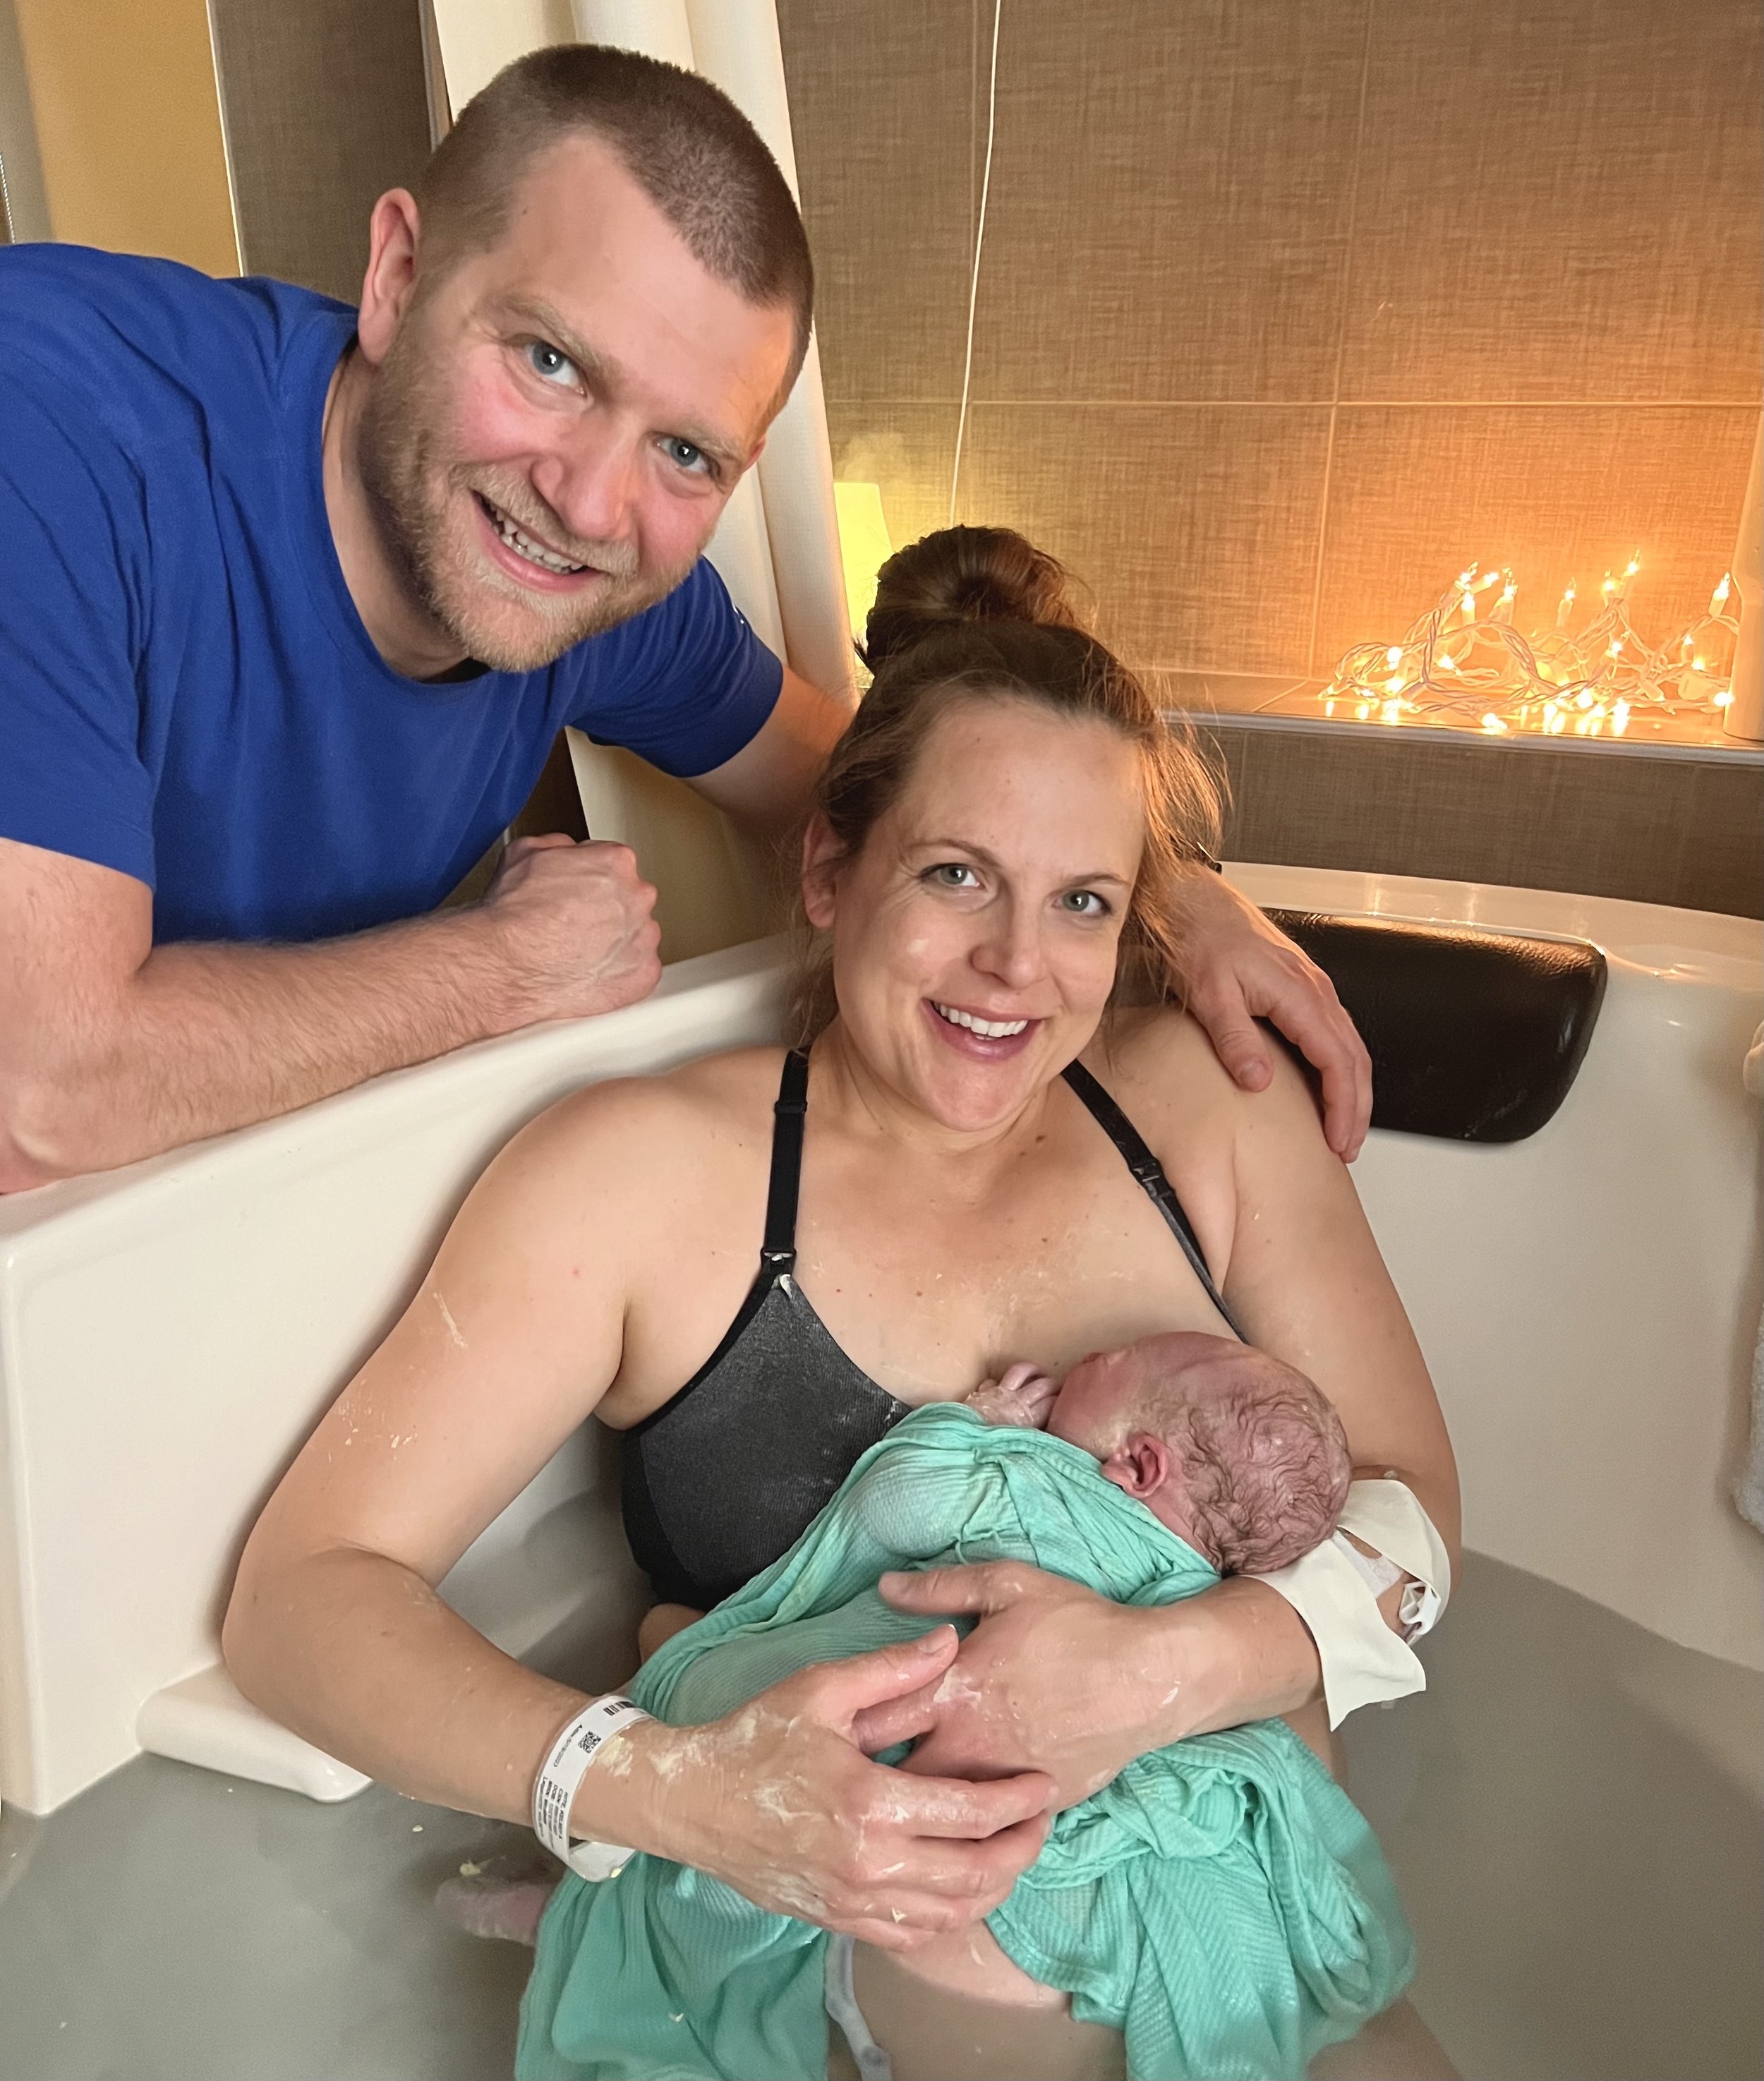
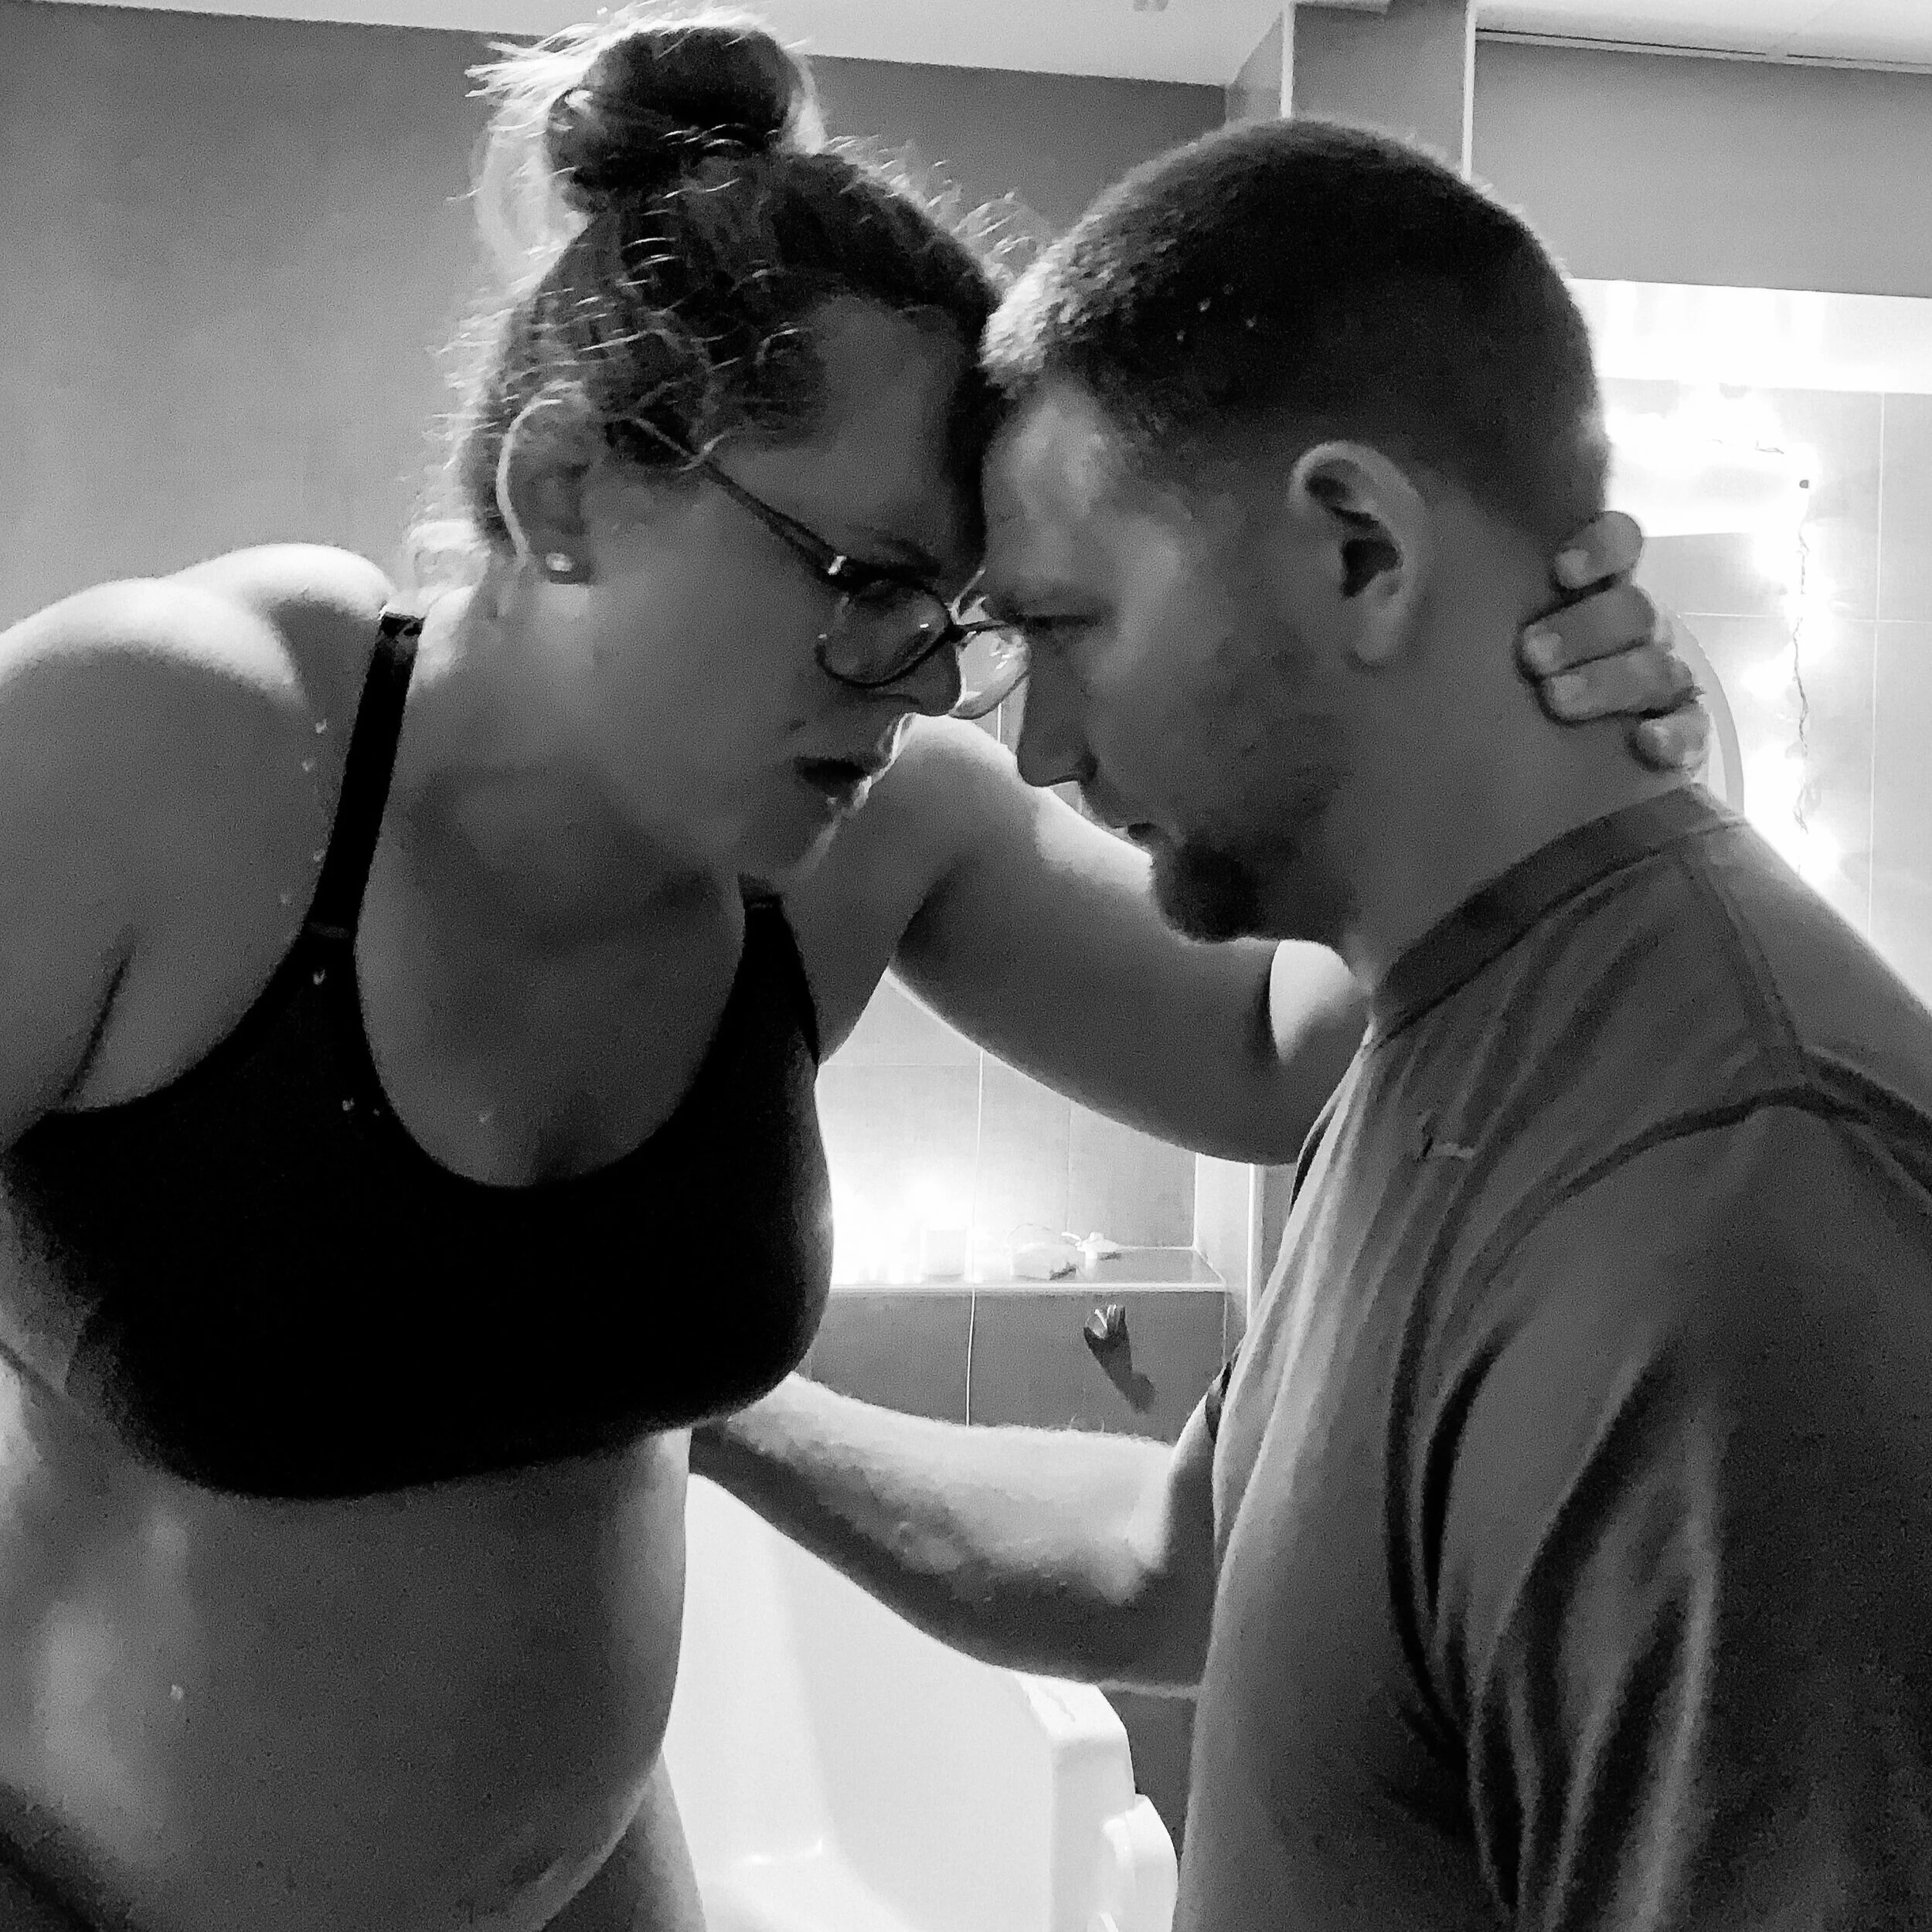
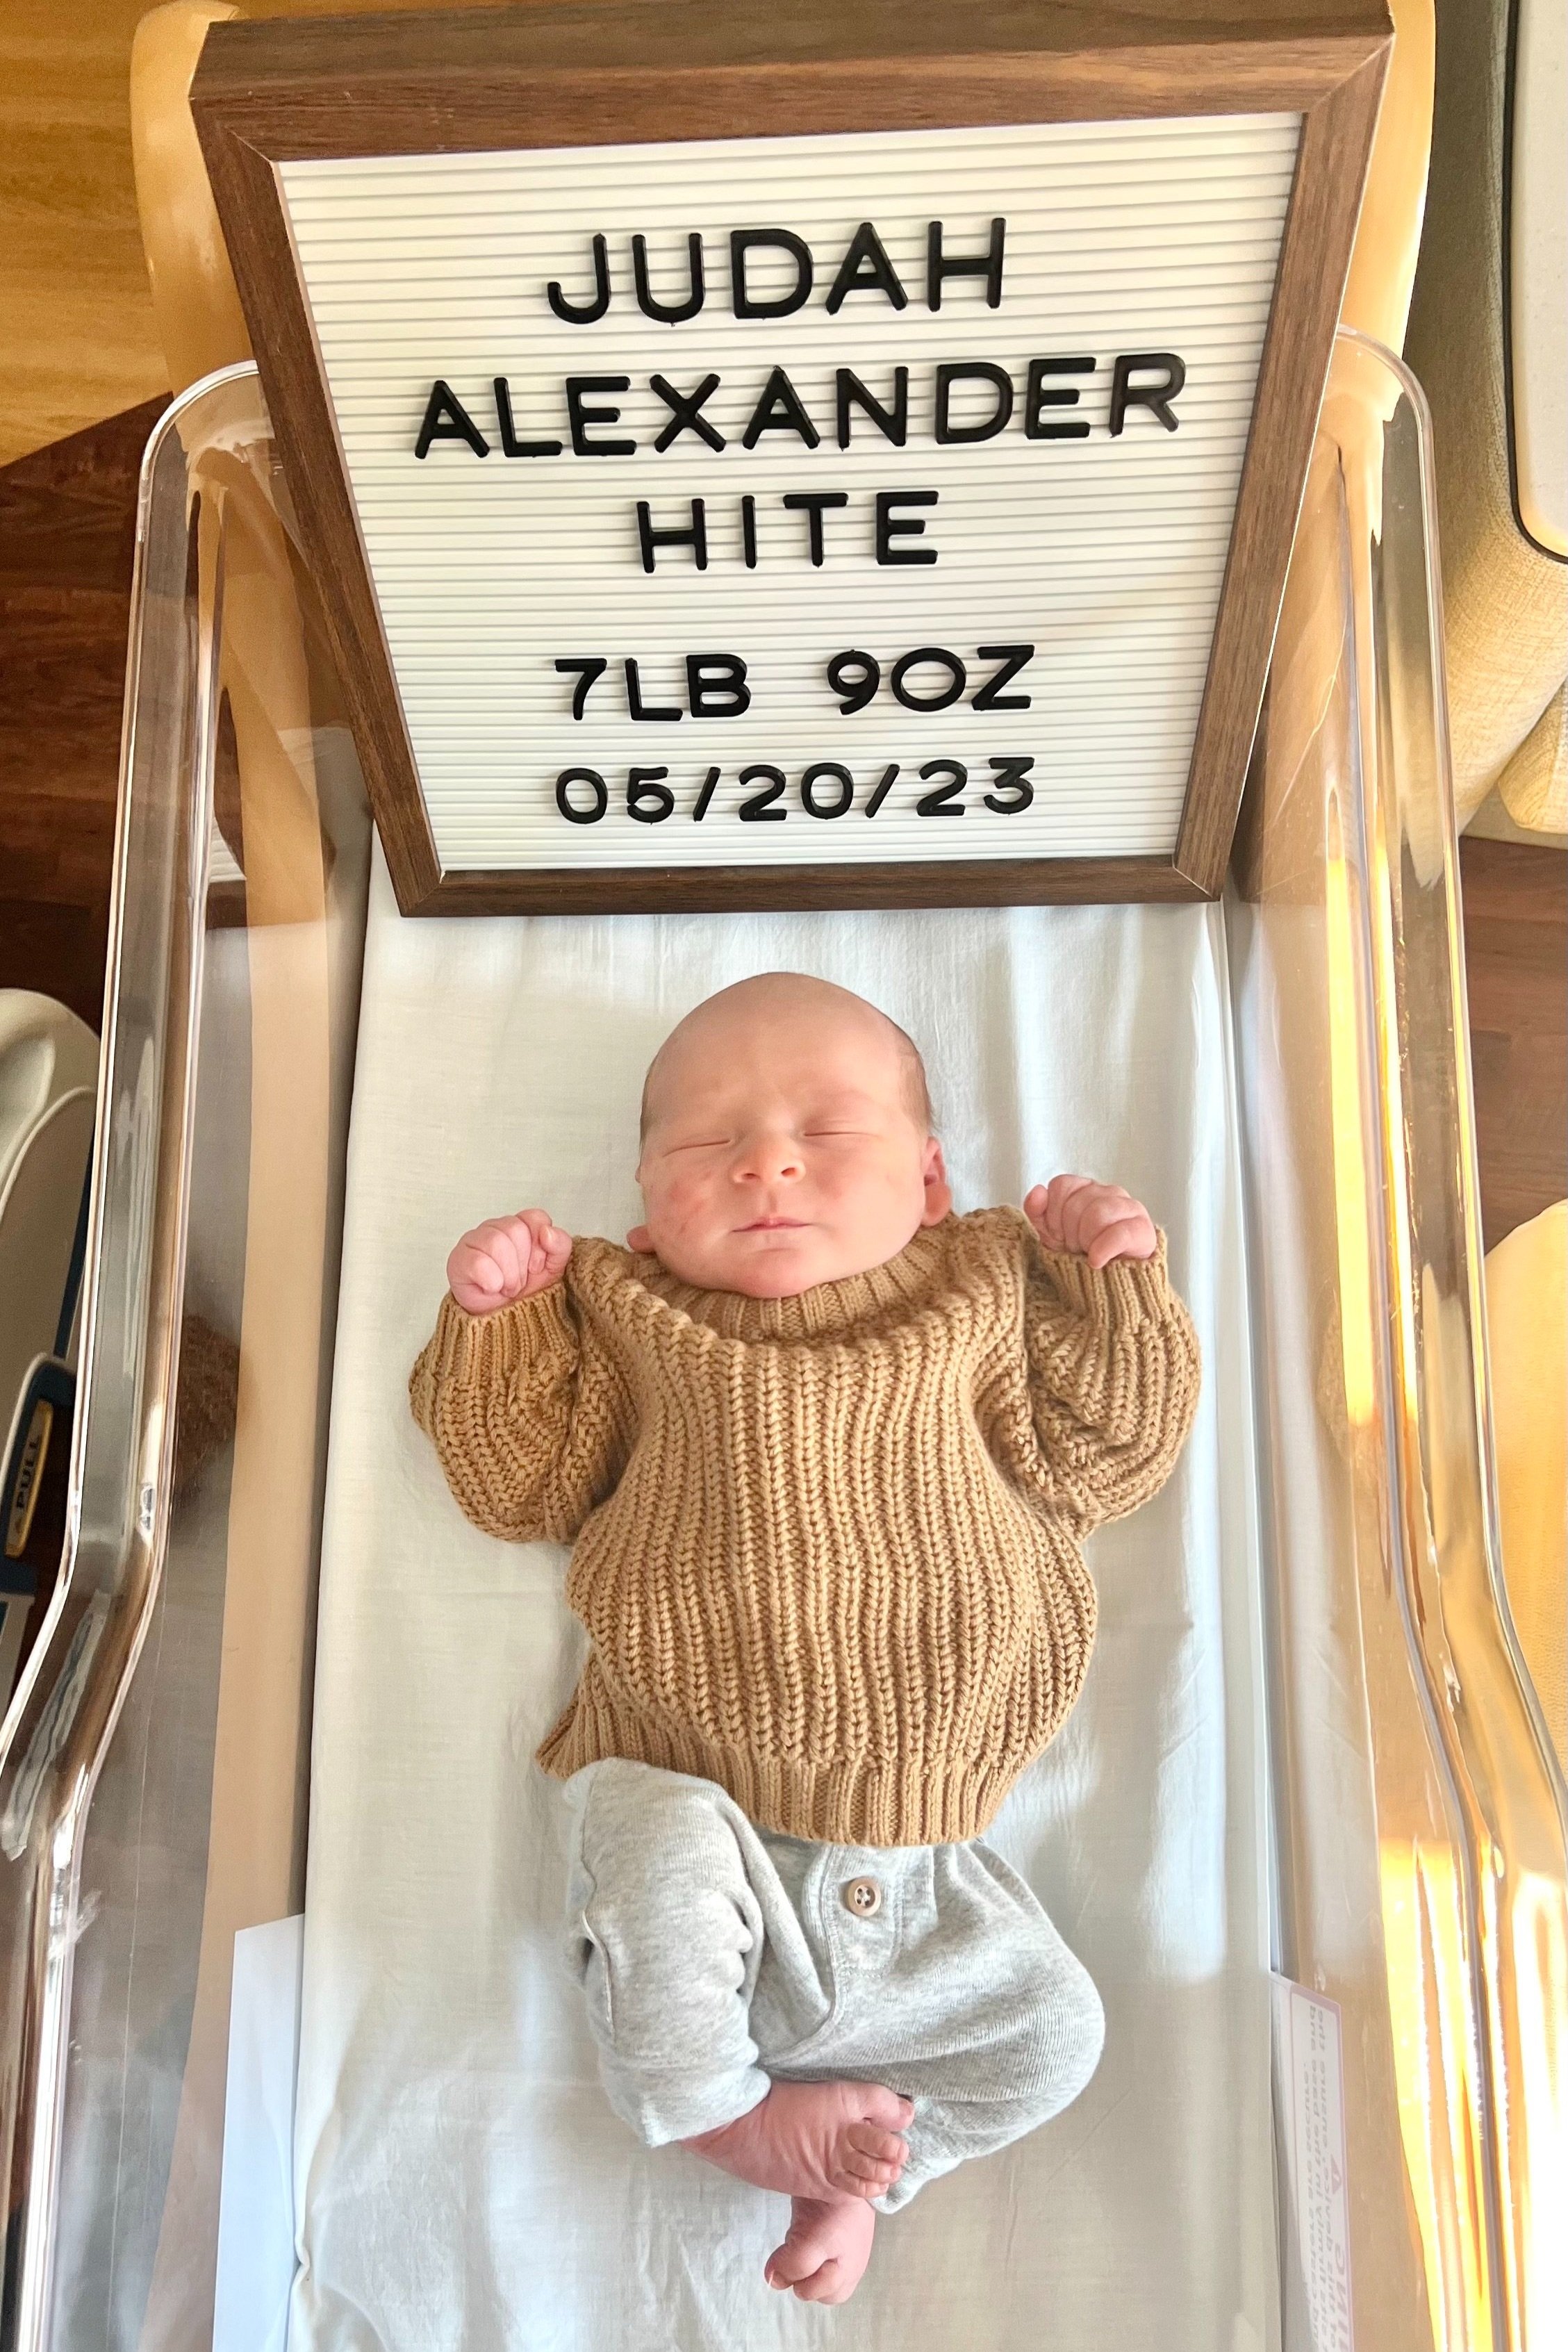
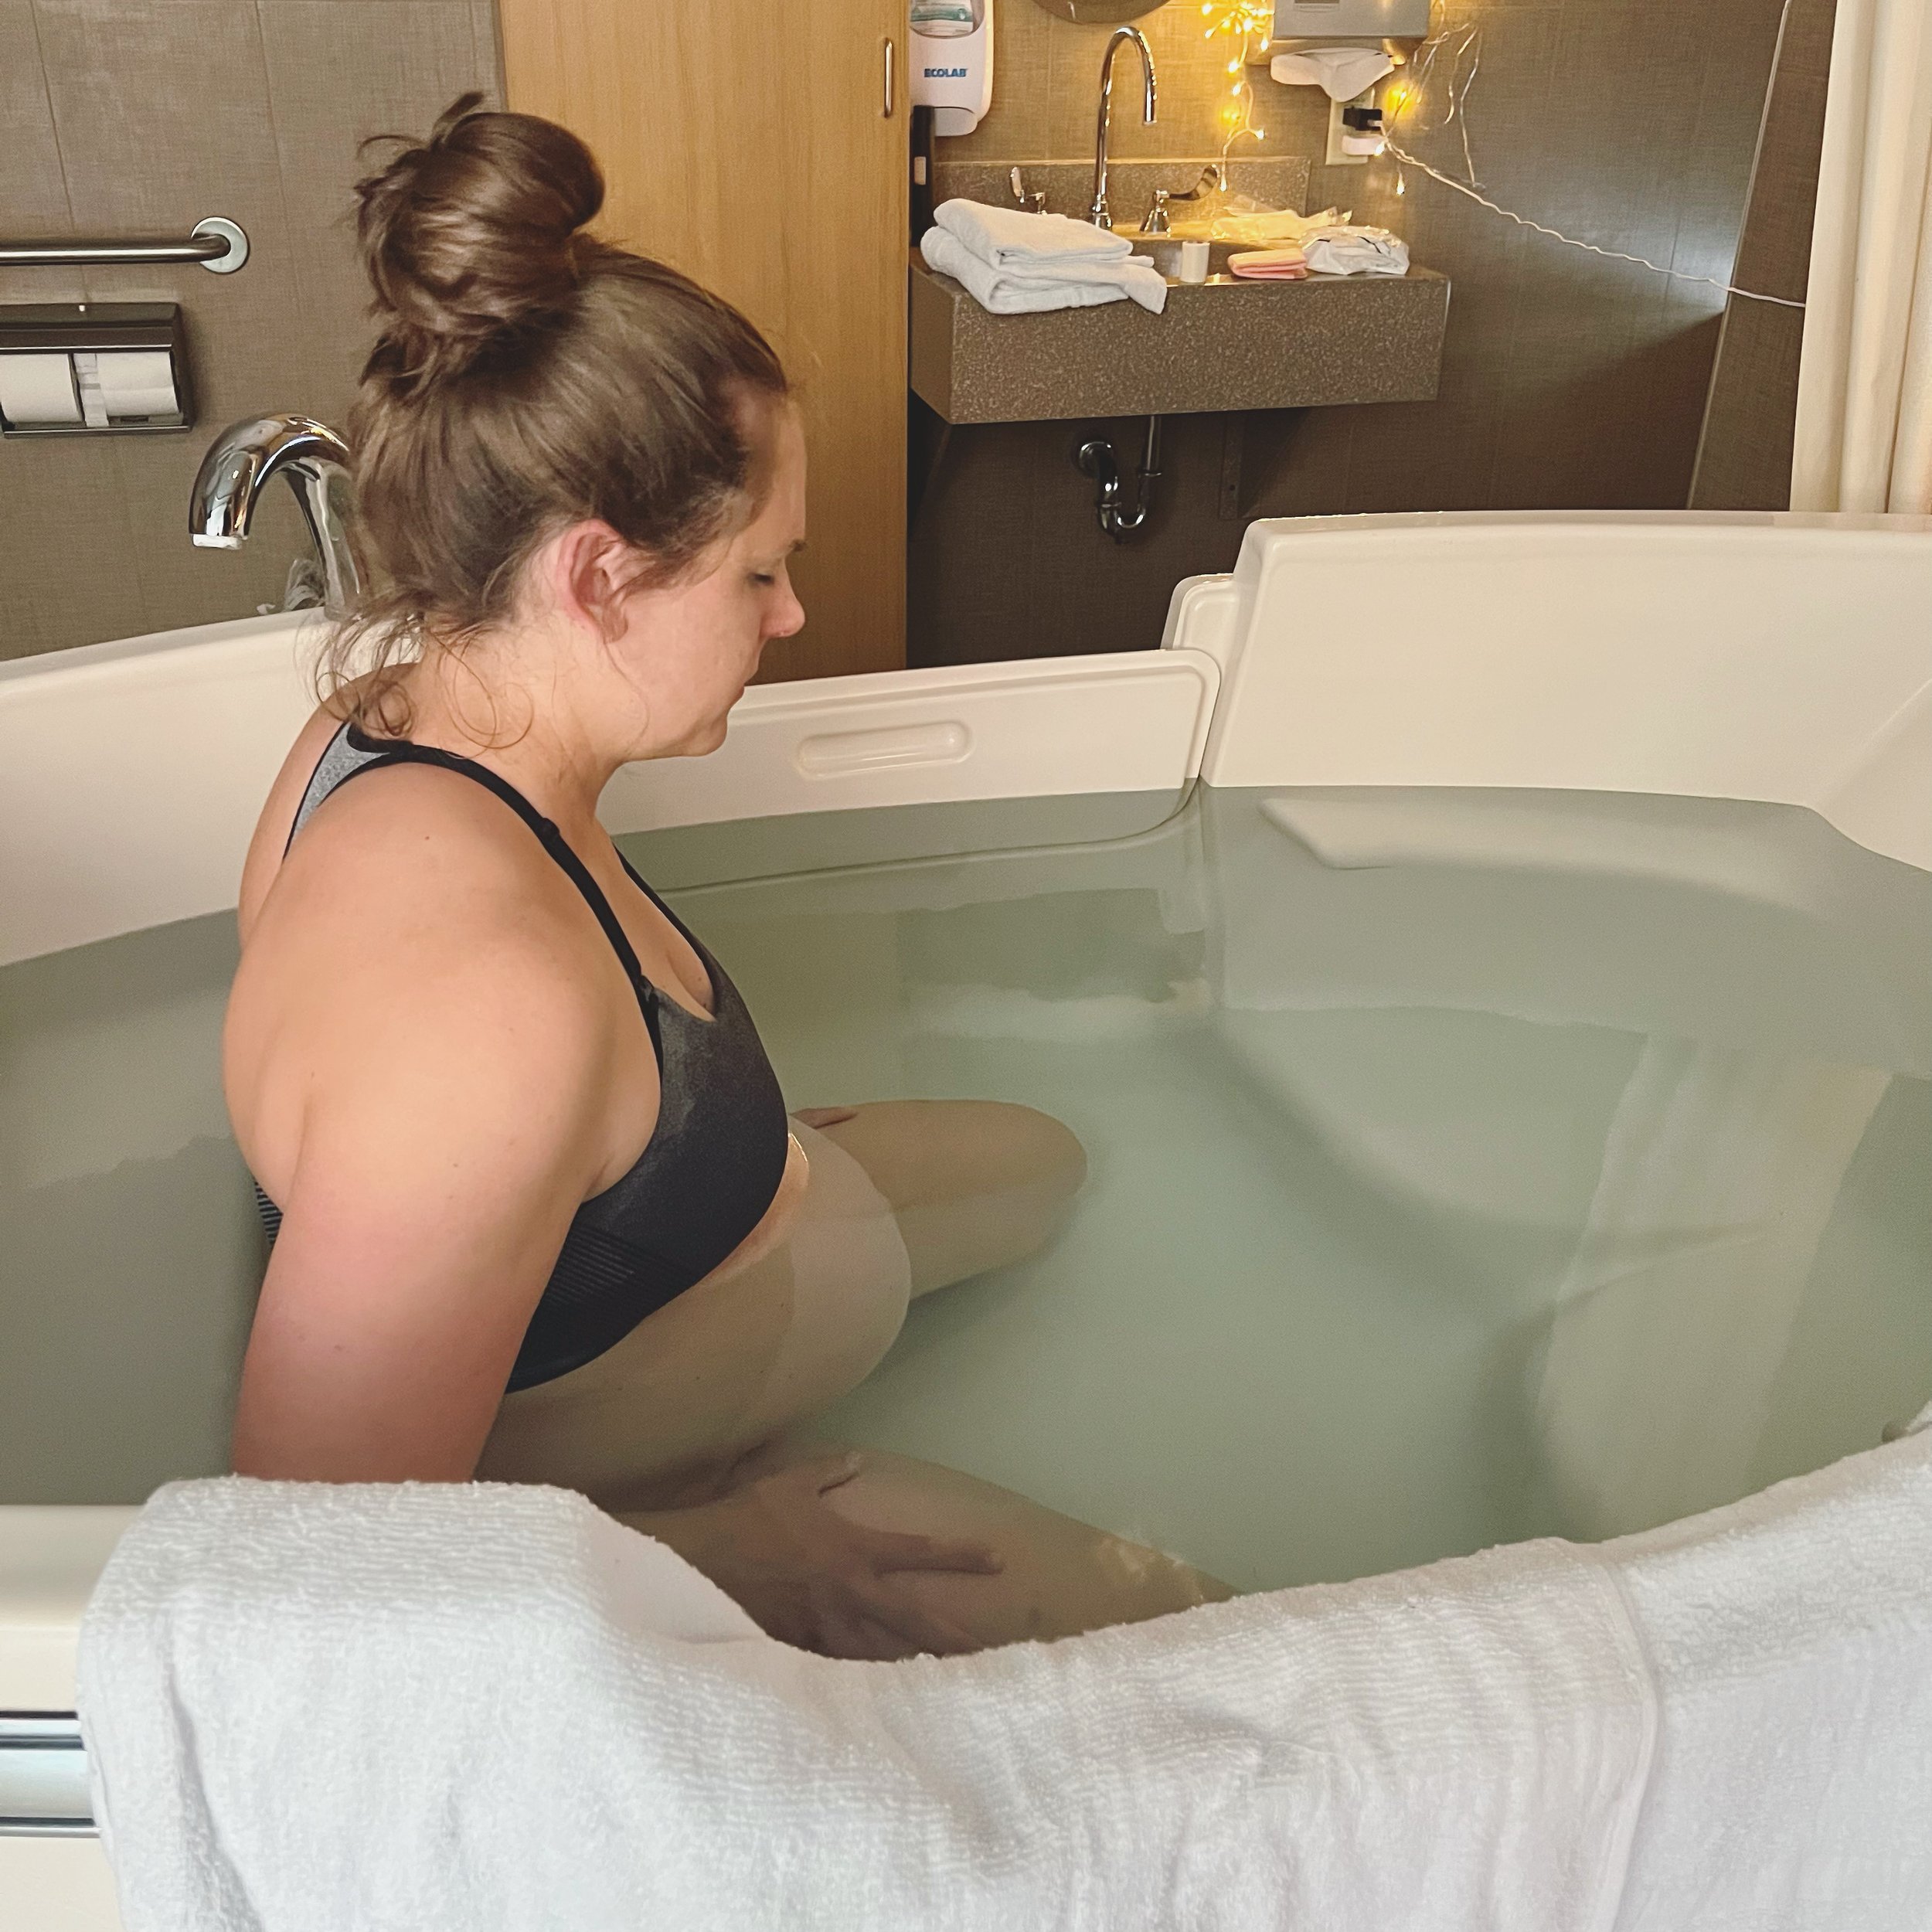
I got all checked into triage and the nurse was helping with all the intake information while I was lying down. This felt so off to me as with my other two labors, during the triage stage I was in very active labor and could hardly answer questions between contractions and there was no way anyone was getting me to lie down. But this time, everything was so slow. I did get up and do some squats while we waited for our room to keep things progressing if possible. The midwife checked me and I was 3 cm dilated. When we got to the hospital I told Alex that I was likely 3 or 4 cm dilated. It’s funny how you get to know your body from previous labors. I wasn’t discouraged when I heard the number, more just numb to the fact that this was sooooo different from previous labors. After a while, we were taken up to our room. Thankfully there was one with a birthing tub available. My nurse was so great and helped me laugh a bit as we got settled. The most memorable thing from about 1-4am is that I felt so out of my element. Physically I knew what I could do, and I tried lots of different positions and movements to help my contractions get stronger and/or baby in an ideal position, but mentally I was defeated and distraught. Things I did: bounced on a yoga ball, hip circles on the yoga ball, elevated lunges, squats, rocking on all fours, puppy dog pose, sitting on the toilet, and the Miles Circuit (a series of stretches you hold for a while). My midwife and nurse came in together at one point and asked what I wanted to try next. They had initially given me the option of pitocin, but knew I wanted as much of an intervention free birth as possible. My midwife was really great at respecting this and kept saying “it’s totally your choice”. I could tell my nurse thought I was a bit crazy for not just doing pitocin, but she definitely respected me and was supportive as well. Another option I inquired about was nipple stimulation. They were both familiar with this and said I would use a hospital grade pump, one nipple at a time for 10 minutes and then take a 10 minute break. This would be repeated 3 times, so it's more lengthy but I wanted to try all the natural options prior to drugs. My nurse got me all set up with the pump and reminded me of the process. So for the next 1.5 hours I sat on the yoga ball and did the nipple stimulation. I didn’t feel much different afterwards so my nurse and midwife suggested I get some rest and try to sleep. It wasn’t really what I wanted to do but I trusted their opinion and knew I had a long day ahead of me. My nurse set me up with a peanut ball and helped me get as comfy as possible (I believe this was around 3:20am). Surprisingly, I was able to node off and get some sleep. I did still feel my contractions (though not as strongly), but it was almost like a dream state and I was able to get back to sleep fairly quickly after each one. I think it was around 5:30am when I had two more intense contractions back to back that I decided to get up and use the toilet. I decided I wanted to get the show on the road and resting longer wouldn’t help that. I was back to walking and lunging when the nurses came in for shift change. While they were introducing my new nurse, I had an intense contraction. Yes!! Finally some progress. Between 7-8am I was back and forth between the toilet or leaning on the raised bed during contractions. When my new nurse came in the second time, she made a comment that I was definitely progressing and she said I was in active labor. At this point I don’t recall a lot, but things were definitely intensifying and I had to really focus on my breathing during each contraction. The nurses started filling the tub with warm water and I kept pacing and breathing. At 8:45am I got in the tub. I was most comfortable on my knees and would lean over the ledge during a contraction while holding Alex’s hand. I remember being more in control during each contraction than my previous labors, which in hindsight might have been because I had been waiting so long for them to intensify that I was welcoming them. I had a handful of contractions in the tub and at 9:15 was pushing and baby boy was born at 9:17am. We have his grand entrance on video as a nurse held a mirror in the water which is pretty cool. I do remember my midwife being so calm and telling me to slow my breathing down which was very helpful for me to center myself. After I had pushed one or two times (I can’t remember exactly), his head was out and then she told me to choose a leg to bring up and then push again when I felt I should. After the delivery, I told her that was a helpful suggestion and she told me the reasoning is that sometimes a baby’s shoulder just needs a little more room or a gentle nudge to get out and by bringing one leg up to a lunge position that creates space to do so. He literally slid out so easily as soon as I put my leg up. I got to catch him and bring him up to my chest myself which was super special. He was here and healthy and all was good! Judah and I bonded in the tub for a few minutes and I got him nursing asap. 

      I had asked my midwife, prior that morning, if I could birth the placenta before we cut his umbilical cord and she had agreed. I think God was watching out for me and gave me the best midwife for my wishes as she was familiar with this practice and had done it prior when she was a home birth midwife. My prior two births I bled quite a bit. Not hemmorage level but still enough that I was given IV pitocin and this time I wanted to avoid this if possible. I had done a lot of research on what I could do naturally to help prevent bleeding and I honestly think the combination of things I did, along with not cutting the cord prior to birthing the placenta, was the reason I only bled ⅓ of the amount in comparison with my first two deliveries. If you take anything away from this please know that you should and can advocate for your wishes. It first takes knowing and understanding the options, so definitely educate yourself. I can’t recommend the book Mama Natural’s pregnancy book enough. Along with Ina May’s Guide to Childbirth. And then listen to and watch as many birth stories as possible via podcasts, IG, or YouTube. The Birth Hour podcast is a great listen for all types of pregnancies/deliveries. Since I had a history of bleeding, the nurses and midwife helped me to the bed where they could better measure output. Judah continued to nurse which helped increase my oxytocin which helps the uterus contract back down and release the placenta and then tells the blood vessels to clot up. As part of my birth plan I did consent to getting the intramuscular Pitocin in my thigh, which they had administered while I was still in the tub. I felt safest doing this along with my natural remedies. The amount of Pitocin they give intramuscular is 1/10 of what I received in my IV previously. I don’t know that I talked about the afterbirth much in my other birth stories, but I want to note about it here as I don’t think it’s talked about enough. After birth, the uterus has to contract back down in size, these contractions are still painful and with subsequent births they are very intense, and I need to breath through them. In addition, the nurse has to push on and massage your uterus every 10-20 minutes to help encourage contractions and to push more blood out. This is painful and not fun! So while in bliss and lots of joy with my newborn skin to skin, I’m also gritting my teeth and deep breathing. Although, not receiving IV Pitocin postpartum the third time, was a much more pleasant experience than the first two. My midwife and nurses were so great and I have nothing but positive reviews for everyone.

Raelynn's Birth Story

IMG_3811 2.jpg

Raelynn Joy was born on Friday, June 25th at 7:47am. I wanted to record her birth story so that I could share this special story with Rae someday, as well as help inform and inspire other mamas in their own labor/delivery. Birth stories are a vital part of how I prepare for labor and delivery.

I started experiencing Braxton Hick contractions around week 34. These aren’t true contractions, but rather a painless tightening of the uterus that causes the abdomen to become very hard. They are irregular and infrequent and will usually go away if you change positions. I had these with Eli’s pregnancy as well. A major difference between my first and second pregnancy was the prodromal labor I experienced this time around though. On Sunday, June 20th, I started noticing contractions that were more than just tightening. I had some discomfort and the slightest bit of pain. At one point I counted 5 contractions in 1 hour so I thought something may be happening. But that night I was able to sleep just fine and nothing ever progressed. The following days, I realized I was experiencing prodromal labor. The contractions were more close together and had some pain associated with them. These contractions are more preparatory than Braxton Hicks contractions and may help get the baby into a suitable position for delivery. I went to bed each night not knowing if that would be the night. Needless to say I didn’t sleep the best that week. Another difference this pregnancy was that I started losing my mucus plug about a week before I went into true labor. With Eli it all came out during active labor, right before the “bloody show”.

Thursday I was pretty miserable with even more “practice” contractions and was just tired and not myself. I forced myself to take a shower and go to bed early since I was so tired. Right before going to bed I downloaded a contraction app and recorded one of the contractions. It was 9:19pm and lasted 1:19 min. I think I woke up 1 or 2 more times but didn’t track anything because it was usually in the middle of a contraction that I’d wake. Then around 1:15am I started tracking as I had an intuition something more was happening for me to wake this often. Basically from 1:15am-4:00am I was getting contractions every 10-15 minutes that lasted 1-2 minutes. Somehow I was able to sleep a little during this time, not much though. Lots of trips to the bathroom and then back to bed. I did a few cat/cow stretches as well as puppy dog, while breathing through some of the contractions. They weren’t really painful at this point at all though. Then around 4:30am I remember telling Alex to pack up his things and that we’d likely be leaving within 2 hours. I was losing a bit more of my mucus plug, which was a sign to me that I was dilating. I was getting a bit anxious to call my mom as I knew she likely had to pack since it was before my due date. I called her shortly after 4:30am and told her to take her time, but that she should come when she could. At this point, my contractions were definitely stronger and I had to close my eyes and really breathe through each one. The best position for me was standing and leaning against a counter or pushing on the wall. Around 5am I called the hospital to check in with the midwives and get their opinion on whether I should come in. Since my contractions had been every 4 minutes or so for 1 minute in length for over an hour, I thought it would be a good idea. This is the 4-1-1 rule that many people use to know when to go to the hospital. I kept second guessing myself since I hadn't experienced the “bloody show” yet (this was the clear indicator last time to head to the hospital), but the midwife said I sounded pretty relaxed still and that I could definitely come in to get checked or wait a bit, it was up to me. I didn’t think things were as painful as when I had gone in with Eli, so I decided in my mind to try to wait until 6am to leave. The next hour I was in and out of the bathroom, and walking around breathing through the contractions. Elijah woke up around 5:20am, he likely heard us or could feel something was up. I really wanted to see him before we left so I told Alex to just get him up for the day. It was nice to see him and give him a hug. My mom arrived a little while after and Alex started packing the car. Things were definitely intensifying and I was having a hard time remembering to breathe through the contractions. I said we needed to go and remember looking at the clock and it was just a few minutes before 6am. I walked into our garage and had 2 more contractions there, leaning over one of our exercise boxes. I waited until a contraction had just finished and got into the back of our Ford Escape; there was no way I could sit. I was on all fours, half over Eli’s car seat. As everyone says, the car ride is the worst but we only had 15 minutes to go so I kept telling myself we’d be there soon! My eyes were closed most of the ride and I just tried to concentrate on my breath and not tensing up.

I got out of the car as soon as possible and had 2 contractions in the parking lot while slowly walking in. Alex got me checked in, and I just leaned over things and breathed through contractions. They got me in triage pretty quickly and the nurse started strapping the monitor on me to find baby’s heartbeat. She asked me intake questions and the midwife came in the check my dilation and I was at a 6! This is where I was at with Eli when I got to the hospital as well which reassured me. Luckily, one of the two rooms with a birthing tub was available so we made our way to the elevator. The rest of the birth is kind of a blur to me as I was definitely very much in my own headspace and really needed to concentrate on my breath and posture with each contraction. They were coming more frequently and were definitely intense! In the moment I remember thinking dang, this is more intense than last time but now looking back it seemed like a breeze in comparison to my first birth just because of how short the labor was. I guess this is why mamas are able to have multiple births, you do definitely forget a lot of the pain. For 30 minutes or so it seemed like the nurse was setting up the room, asking me questions, putting an IV in (I knew of this ahead of time since I bled a lot with Eli post-birth), and filling up the tub. I was in between holding onto Alex and leaning over the raised hospital bed with each contraction. Alex was good about making me sip water in between contractions. I really just wanted to get in the tub to relieve some of the pressure! When the water was high enough I got in and it felt better, or at least I was able to relax more. By this point my body was naturally helping push baby down with each contraction. My births are not the quiet, calm ones you see on IG and YouTube. I am loud and very vocal. So with each contraction I try to breathe deeply with an open mouth, but when my body starts bearing down I definitely sound like an animal as I breathe out. No shame! The nurse asked if I felt like I needed to push and I said yes, I think so. I had this natural bearing down for 2 hours with Eli though so I was confused if I should also actively be pushing at this point. The hospital was super busy with deliveries and my original midwife had only come in once and had gotten pulled out to deliver a babe. They got another nurse (I’m assuming more certified) to check me again to make sure I could push. Sure enough I was a 10. So in a matter of 1 hour I went from a 6 to a 10! There were two midwives at the hospital because they were so busy.

16D358BC-E294-411B-AAE1-8B53F5645136.JPG

Carol rushed in and put on gloves as fast as she could, two contractions and pushes later baby girl was here! I was a bit scared that she was coming so fast, it was really a whirlwind. The upside is that I only had the ring of fire pain for one contraction versus 5 with my first. Her head came out at the top of a contraction/push and then with a little more of a deep push and using my legs to brace myself in the tub and get more strength her body came out very soon after in the same contraction. Carol had told me to reach down and grab her, which freaked me out for some reason. There was just so much adrenaline running through me I was maybe afraid I’d do something wrong. But I reached down and pulled her up and was so relieved she was here. The first thing I noticed was how much vernix she had! We got to bond in the water a bit and then eventually they helped me get to the bed, while my placenta was still in and Raelynn was still attached as well. Delayed cord clamping is very important to me. After a few more minutes, Alex cut the cord and then I pushed out the placenta with the guidance of Carol. She accessed me and said I had no tearing at all! I also got the shot of pitocin in my leg at this time (also something I consented to with my history of bleeding). At this point I was shaking uncontrollably, it was weird and I didn’t like it but I guess it’s pretty typical for fast labors as the body regulates back down. I was losing more blood than they liked, so they wanted to start an IV pitocin drip. I agreed, even though this was the worst part of my delivery/postpartum experience the first time, as I knew it would help me from hemorrhaging hopefully and needing a transfusion. Luckily the drip was at a slower pace this time so the contractions weren’t quick as intense. 

Raelynn and I bonded and I got her on my boob ASAP. She latched decently and stayed there for a long while. My labor and delivery was about 6 hours overall. Alex and I hadn’t decided on a name yet, so we spent the next few hours discussing and recovering before we were moved up to our main room.

D9F5D6D9-F07B-42E4-A291-7D87DF877DE8.JPG

Sunscreen

There is no doubt about it, the sun’s rays can damage our skin and lead to cancer. Proper knowledge of the sun and skin can help prevent against cancer, sun spots, sunburns, and wrinkles. Did you know that in the US, more people are diagnosed with skin cancer than all other cancers combined?!?! And 90% of the signs of aging are caused by the sun!! Besides using sunscreen as a protective barrier, there are a few things to keep in mind as we head into the summer months:

  • wear hats, clothing, and sunglasses when possible

  • avoid the sun when it’s at it’s peak

  • take breaks in the shade often

When fun in the sun with exposed skin is inevitable, it’s best to apply a sunscreen. But do you actually know what sunscreen is, how it works, what ingredients are in your sunscreen, or how often to apply?

What is sunscreen?

Sunscreens are topical treatments, with active ingredients, used to protect the skin from the harmful effects of the sun. They help to prevent sunburn and premature aging (such as wrinkles, leathery skin). They work to help decrease the risk of cancer.

How does sunscreen work?

There are two types of sunscreens currently approved by the FDA: chemical and mineral. Both of which protect from UV rays but by different means.

  • Chemical Sunscreen: protects by allowing the UV rays to absorb into the top layer of the skin and then converts them into heat which is then released back into the air. Think of this type as a sun filter.

  • Mineral Sunscreen (aka physical sunscreen): protects by creating a physical barrier on the skin which reflects the suns harmful rays.

What ingredients make up sunscreens?

  • Chemical sunscreens are typically composed of oxybenzone, avobenzone, octisalate, octocrylene, homosalate, and/or octinoxate.

    • Oxybenzone is the most worrisome active ingredient. In an evaluation of CDC-collected exposure data for American children, researchers found that adolescent boys with higher oxybenzone measurements had significantly lower total testosterone levels (Scinicariello 2016). Recently, the European Commission found current human exposure levels to oxybenzone to be unsafe and proposed a concentration restriction of 2.2 percent (SCCS 2020) – lower than the limited amount allowed in U.S. sunscreens, which is up to 6 percent.

    • Octinoxate is an organic UV filter. It is readily absorbed into the skin and continues to be absorbed after the sunscreen has been applied. It has been found in blood 16 times above the proposed FDA safety threshold (Matta 2019, 2020). Several countries ban the sale of sunscreens made with octinoxate, because they may be harmful to aquatic life.

  • Mineral sunscreens use zinc oxide and/or titanium dioxide as their active ingredients.

    • The FDA proposed that both titanium dioxide and zinc oxide be classified as safe and effective. Evidence suggests that few if any zinc or titanium particles penetrate the skin to reach living tissues (Gulson, 2012, Sadrieh 2010).

    • Titanium dioxide is classified as a possible human carcinogen by the International Agency for Research on Cancer, because of the potential of exposure through inhalation. For this reason, powdered or spray formulations containing titanium dioxide are of concern. Zinc oxide also carries inhalation concerns when used in spray and powder products.

    • Zinc oxide and titanium dioxide are normally found in the form known as nanoparticles. Nanomaterials shouldn’t be inhaled, as they can lead to adverse health effects and may have ecological impacts. Beautycounter does not feel there is sufficient evidence to date to draw conclusions about nano zinc oxide. The bottom line is that since we don’t know if nanoparticles are risk-free, Beautycounter simply chooses NOT to use nanotechnology for this reason!

4.png

Pros/Cons:

Chemical

  • pros: easy to apply and rub in, effective against UV rays

  • cons: higher change of irritation for those with sensitive skin and rosacea, banned in some states due to harmful effects on the coral reefs

Mineral

  • pros: effective agains UV rays, instant protection (no need for absorption), can be used in any state

  • cons: some have a chalky cast after applying, some feel thicker on the skin

What does SPF mean? Why you don’t want an SPF higher than 30…

SPF stands for Sun Protective Factor and tells you how it will take for the sun to redden your skin when using the product directly as instructed. So if the SPF is 30, it would ideally take you 30 times longer to burn than if you were not wearing any SPF coverage. It is important to note that a sunscreen’s SPF level tells us its ability to block UVB rays; it doesn’t indicate the product’s ability to block UVA rays though. UV is the ultraviolet light that is invisible to the human eye. There are two types of UV rays and it’s important to protect the skin against both: UVB and UVA.

  • UVB rays cause sunburn and play a key role in developing skin cancer. A sunscreen’s SPF number refers mainly to the amount of UVB protection it provides.

  • UVA rays cause skin damage that leads to tanning as well as skin aging and wrinkles. UVA rays are less powerful, BUT they penetrate deeper into the skin, causing free-radical damage. The shortest wavelengths of UVA rays also contribute to sunburn. It’s important to look for the words “broad spectrum” on a product’s label, which means it has ingredients that can protect you from UVA as well as UVB rays.

Most people don’t know the differences between different SPF values and their ability to block the sun’s rays. An SPF of 100 does not mean double the protection of an SPF of 50. In 2019, the FDA proposed higher SPF values have not been shown to provide additional clinical benefit and may provide users with a false sense of security. To guard against this misconception, the agency proposes limiting products’ SPF claims to 60+. Using a higher SPF often leads consumers to believe they need to apply less often because they are more protected. Unfortunately, this leads to overexposure to the sun’s rays and thus an increased risk of long-term skin damage and cancer.

The difference in SPF protection is pretty small. and SPF of 30 blocks 97% of rays, SPF of 50 blocks 98%, and SPF of 100 blocks 99%. BUT NO SUNSCREEN can block 100% of rays. So why not choose an SPF of 100 over one of 30? Because higher SPF leads to more harmful chemicals. Higher SPF sunscreens require higher concentrations of sun-filtering chemicals than lower SPF sunscreens.

The chemicals found in higher SPF sunscreens have been linked to allergic skin reactions, tissue damage, hormone disruption (negative birth outcomes, reduced male fertility), and aquatic life toxicity. There is no evidence that SPF's above 30 are any better at reducing skin damage/cancer.

In addition, when the SPF increases, the ratio of UVB and UVA protection becomes weaker. An ideal SPF gives coverage from both types of rays, not just UVB! Choosing an SPF of 30 should optimize protection against both UVB and UVA rays, offer great sunburn protection AND limit exposure to harmful chemicals. Zinc oxide is a great UVA filter! SPF is regulated by the FDA, unlike most other chemicals, as it is considered a drug. But sunscreen regulations have not been updated since 2011. In 2019, the FDA released a draft monograph, with a goal of updating sunscreen regulations that year. However, due to changes in the way over-the-counter-drugs are regulated, the proposal was withdrawn in the first coronavirus relief bill. The FDA is due to propose new sunscreen regulations this fall (2021).

There is a third type of light to be aware of: Blue Light.

High-Energy Visible (HEV) blue light comes from the sun, but we are also exposed by smartphones, tablets, and computer screens. Blue light can cause skin damage, including signs of aging. Most sunscreens don’t offer coverage from blue light, but there are some like Beautycounter’s CounterSun that does!

SPF best practices?

The best practices are to apply sun screen liberally and evenly at least 15 minutes prior to sun exposure. Then reapply immediately after swimming, sweating, towel drying, and at least every 2 hours.

Resources:

https://www.webmd.com/drugs/2/drug-366/sunscreen-topical/details

https://www.piedmont.org/living-better/the-difference-between-physical-and-chemical-sunscreen

https://www.ewg.org/sunscreen/report/executive-summary/

https://www.skincancer.org/skin-cancer-prevention/sun-protection/sunscreen/

Natural Deodorant

Deodorant


When I found out a close friend of mine was using a deodorant with aluminum in it (technically an antiperspirant), I realized that some of you may be as well. Less-toxic deodorant is the first thing I encourage everyone to switch to when they are looking at their body products. Why you ask?

1. deodorant is likely applied once a day, if not more

2. the skin in our underarms is close to breast tissue and lymph nodes, is very porous, and absorbs what is put on it...shaving creates micro-cuts and comprises our first layer of defense

3. sweating is our body's natural detox mechanism...we sweat out heavy metals and pesticides!

4. antiperspirants stop the natural sweating and lead to clogged pores with trapped toxins

5. a lot of deodorants have ingredients I advice avoiding


The most concerning ingredients being:

*ALUMINUM: a metal that makes deodorant antiperspirants so you don't sweat as much. Aluminum concentrations have been found higher in the tissues closest to the underarm and some scientists hypothesize it is linked to breast cancer.

*PARABENS: I've touched on this before, but parabens are a family of preservatives used in many cosmetics. They are also known endocrine disruptors, that are not currently regulated by the FDA. Meaning they can mimic estrogen and disrupt normal hormonal pathways and reproductive toxicity. According to the National Cancer Institute, excess estrogen plays a role in promoting growth of cancer cells.

*FRAGRANCE: this term could be up to any of 3,000 ingredients, including phthalates. There is NO regulation for the ingredient "fragrance or perfume". Phthalates are plasticising chemicals that help scents last longer, but have been linked to cancer, endocrine disruption, suppressed thyroid function, early puberty, and birth defects.

*TRICOLSAN: this is an antibacterial agent and is registered as a pesticide with the FDA!! Although triclosan was banned from hand soaps and sanitizers, it is still found in some deodorants.

The bottom line is check out your ingredient labels! Go to the company's website and do some investigation or see if the EWG website or Healthy Living App has any information on the deodorant you are using.

Making the Switch
Switching to natural deodorant from an antiperspirant will likely cause more sweating as your body adjusts and detoxes. The excess sweating usually only lasts 2-4 weeks as your body rids itself of toxins. In the process your odor will become less funky as toxins are finally released. Sweat is actually odorless and only takes on a smell when it mixes with the natural bacteria that’s on your skin. A healthy diet with lots of probiotics and fermented foods can help balance that bacterial flora. This transition period is necessary and you just need to push through, but what better time than winter in the middle of a pandemic to transition :)

If you have a skin reaction, like itchiness or redness consider not wearing deodorant for a few days and then try again. If it persists, your skin may not like baking soda (a common ingredient in natural deodorants) or certain essential oils used. There are a few brands that don't use baking soda or a lesser amount. In addition, consider an unscented version that won't have any essential oils.

Copy+of+When+you+need+a+pre-prepped+lunch+%281%29.jpg

Recommended Brands ~

Since I've been using natural deodorant for over 5 years now, I've tried my fair share of brands and have learned a few things about each I'd like to share. Please note that I have by no means tried all the safe brands (some of which are listed) and EVERY person has unique skin and sweat glands so my personal experience is just that, personal :) I am not a huge sweater so take that into consideration as well. Although you may find you sweat less a year after making the switch to natural deodorant.


Primally Pure: This has been my favorite for a few years now! It is made with a few simple organic ingredients. No aluminum, parabens, fragrance, triclosan, talc, propylene glycol, or anything artificial. I love how it applies, it lasts me a while, and the scent is subtle which I appreciate. It has never stained my clothes. The texture is a bit softer than a traditional deodorant. I love the blue tansy scent, but have also used the charcoal one and recommend this version if you tend to sweat more heavily. Men especially like the charcoal one! If you are interested in trying Primally Pure you can save 10% using my code: hitenutrition10.

Beautycounter: This is newer to me, but I have tried it now for 4 months and really like it. The application is more like a typical deodorant in that it is a bit more sturdy. The smell lingers more throughout the day so if you like to "smell your pits" this may be a good choice for you. I've been told it does wonders for heavy sweaters by many people (no dripping or making them sweat more during workouts). There are 3 scents: coconut, lavender, and rose. Beautycounter is the first company I am aware of to make a refillable deodorant, making it better for the environment and your wallet! If you'd like to try this deodorant, I'd love to offer you free shipping (please reply to this email or message me on Instagram so we can connect)!

Schmidt's: I used this brand a long time ago, so my memory is a bit vague but I think it was decent and may definitely be worth a try. If anything the application may have made me feel a little more wet? The upside is that it is very reasonably priced, is available in some stores, and rates as a 1 on the EWG app. There are some good scents for men as well!

Humble:I personally haven't used this brand, but another great price point. It rates as a 1 on EWG as well.

Just Ingredients: Again, I personally haven't used this brand, but the woman behind this company knows her stuff and has special formulated her products to be super safe! Another deodorant with minimal ingredients.

American Provenance: This is one of the first brands I used and I liked it enough to use for over a year. It's made local to me here in Wisconsin, which I love supporting local and I could easily find it at HyVee grocery store. It's now available on Amazon and they have some awesome unique scents great for men and women. Super simple ingredients, nothing to hide!

Native: I personally haven't used this brand; mainly because when I first started my natural deodorant journey there were enough negative reviews to steer me a way. But it appears they may have improved their formula as the reviews look better. Native is available at most stores, but it rates as a 3 on EWG mainly because some of the scents simply list "fragrance". The company doesn't list out what ingredients are used to make the fragrance on their website either. My advice if you like Native is to get a scent that doesn't list "fragrance" as there are a few or get the unscented one. In addition, if you find out you are sensitive to baking soda (a typical ingredient in most natural deodorants), Native makes two that do not container baking soda: Coconut & Vanilla or Cotton & Lily.

Freedom: Again, I personally haven't used this brand, but it has the EWG certification which means it is super safe! It's available on Amazon or their website. They also have two scents that are baking soda free: Coco Van or Jasmine Orange Blossom. They also have a sensitive unscented version.

Each & Every: Again, I personally haven't used this brand, but it has the EWG certification which means it is super safe! It's available on Amazon or their website. They use magnesium hydroxide (dead sea salt), which works very similarly to baking soda, creating a high pH environment that is hostile for bacteria growth. They have some great scents for men and women!

Pretty Frank: I used this brand a LONG time ago when it was called Primal Pit Paste, there has since been a name change. I honestly can't remember if there was anything I didn't like. They now have two versions with multiple scents available: one formula with baking soda and one without. It rates as a 1 on EWG so definitely worth a try.

*Now I’d love to know are you using a natural deodorant that I didn’t name above and you think should be on this list?? Please comment below!

20 Freezer Friendly Meals + Storage Tips

IMG_3588.jpg

With the rise of COVID-19, schools closing, shelter-at-home initiatives, and employees being encouraged to work from home, life looks very different for many of us. Although I stay home part-time and my work schedule is already atypical, I’ve had to shift how I cook for some clients and others feel most comfortable canceling. So needless to say, my small business is seeing an impact. So I have a little more time to get some resources out to you all, and I want to start by giving you some yummy freezer meals to help encourage you to grocery shop less frequently to further aid in slowing the spread of COVID-19. I’m guessing you are having to prepare a lot more food than normal with working from home and/or having your kids home for lunch. These meals are all family friendly, can be prepared in advance, and offer a good nutritional punch in order to help you rest assured that your family’s nutritional health is being well taken care of. If you have young toddlers who may not particularly care for a meal, my suggestion is to have them take one bite in order to give them exposure to more tastes/textures. Then if there is something they would be willing to eat from the meal (ex: cubed chicken or broth and carrots) have them eat that. As a nutritionist I don’t recommend giving your child free range of meal time; being a short order cook is not fun! If they are hungry they will eat. And if they aren’t hungry enough you may need to consider how many snacks are being offered between meals. Make sure to read how to best prepare and store these as freezer meals. If you use wide-mouth mason jars I highly recommend getting this affordable wide-mouth funnel. Trust me when I say: IT IS A LIFE SAVER for easy transfers and no-mess!

SLOW COOKER MEALS:

Preparation and storage tip: My recommendation is to prepare these recipes as the directions indicate. Then simply portion soups into wide-mouth mason jars (filling 3/4 full to leave room to expand) and the pulled pork into 2-3 separate containers for easy meals. Let everything cool for at least 20 minutes prior to putting any lids on. Then, transfer to the refrigerator to cool for a few more hours or overnight and then you can move the containers to the freezer. Thaw each meal in the refrigerator for 24 hours then reheat in the microwave or stove-top.

BAKED MEALS:

Preparation and storage tip: My recommendation is to prepare these recipes (excluding the meatballs) up until the baking step. For the two casseroles use a 2-quart casserole pan (glass or ceramic are best). For freezing purposes I like these Pyrex storage dishes as they have a lid, stack well, and are oven safe. For the lasagna and shepherd’s pie use 9x13 inch casserole pans for large families OR use 2, 8x8 inch pans (or the Pyrex dishes linked above). If your pan doesn’t have a lid, make sure to wrap the pan in plastic wrap and then aluminum foil (adding a rubber band or two will help everything stay in place). Thaw each meal in the refrigerator for 24 hours prior to baking according to the recipe’s directions.

For the meatballs, prepare according to the directions then transfer cooked meatballs to a container to cool in the refrigerator. After 2-3 hours of cooling (or overnight), transfer the meatballs to a freezer gallon plastic bag. Simply remove however many meatballs you need at a time and reheat in the microwave or oven.

STOVE TOP MEALS:

Preparation and storage tip: Prepare each recipe according to the directions. The chili and soups are best stored in wide-mouth mason jars (filled 3/4 way full). Thaw each meal in the refrigerator for 24 hours then reheat in the microwave or stove-top. Store the chicken fried rice in individual servings or one large container. I really like these Glasslock containers. My husband bikes to work (pre-coronavirus) and has never had these containers leak. To prevent freezer burn fill up the container as much as possible in order to leave little room for air.

BREAKFAST & SNACK IDEAS:

Preparation and storage tip: Prepare each recipe according to the directions. If you have freezer room, I recommend doubling these recipes. It saves time in the long run! Cool everything completely prior to storing. For the muffins, granola, and cookies, I recommend storing them in a large plastic freezer bags. Make sure to remove as much air as possible to avoid freezer-burn. For the pancakes, I recommend layering small pieces of parchment or wax paper in between each one and then storing in a few smaller containers or one large plastic freezer bag (remove as much air as possible). To enjoy muffins, cookies, granola, or pancakes simply remove however much you and/or your family plan to eat from the freezer, place on a plate and heat in the microwave for 30 seconds to 1 minute depending on the quantity. Enjoy granola straight from the freezer or let come to room temperature prior to eating. This granola recipe will also last up to 2 weeks in the pantry if you want to leave some out and freeze the rest.

5 Natural Ways to Boost Immunity + How I Fight Colds

It's that time of year...everyone seems to be coughing, sniffling, sneezing, or just out for the count and home sick! I've been battling a congestion cold the last few days which got me thinking about how I rarely (like hardly ever) get a cold or illness. Soooo, why do I have a cold? I must have picked something up at a recent trip to the gym, and I believe my immune system didn't fight it off because I hadn't been regularly taking my daily dose of elderberry syrup, I wasn't regularly taking my probiotic, I had an increase in the amount of sugar I normally consume (hello brownie recipe development!); plus I have a 4 month old so my sleep has been interrupted more than typical. I know, some of you are probably reading this and calling me crazy. Everyone is prone to get a cold from time to time and although I think that is accurate, there are definitely things you can do to improve your immunity in hopes of fighting the virus or bacteria off more quickly. I don't want to make this too complicated or lengthy, but if you'd like a more scientific reasoning behind these tips please head over to this blog post. Let's dive in!

5 Natural Ways to Boost Immunity

1) Take a probiotic regularly!

Your gut has billions of bacteria that make up your guy flora. These tiny organisms can greatly help increase your immunity and ward off the bad guys. There are A LOT of different probiotics out there and everyone may require something slightly different based on your genes and current gut flora. If you're looking to start a probiotic I recommend one that has multiple strains like BioKult or Just Thrive probiotics. These should both be taken with a meal. In addition, you can eat probiotic rich foods like yogurt, sauerkraut (found in the refrigerated section), and kombucha.

2) Get outside AND take a vitamin D supplement (especially in the winter months)

It's probably safe to say that most of us live above the equator making our daily dose of sunshine way less obtainable. Vitamin D has been shown to reduce your risk of getting a cold or the flu. Adults should consume 2000-5000 IUs a day (especially if you are pregnant). I recommend supplementing with a high quality source of vitamin D. If you prefer a capsule this is a trusted company. Foods high in vitamin D are egg yolk, fatty fish like salmon, grass-fed meats, cheese, and butter.


3) Take elderberry syrup every day as a precaution.

The recommend dose is 1 teaspoon per day for adults and if you are sick you can take 3-4 TBSPs spaced throughout a day. Elderberry syrup is one of the most studied natural remedies and has been proven to shorten the duration of colds/illness. Elderberries are full of antioxidants and immune-boosting compounds. I personally make my own elderberry syrup using Wellness Mama's recipe. I buy these organic elderberries from Amazon and then follow her Instant Pot recipe instructions. I store the syrup in small mason jars, freezing all but 1 at a time. If you don't want to make your own, Gaia makes a great organic syrup that can be found at Whole Foods and most grocery stores. And for kids I recommend this.


4) Incorporate some bone broth into your diet.

Bone broth is very similar to your typical chicken/beef broth except that the bones are simmered for an extensive period (usually 24 hours if using a slow cooker or 90 minutes using a pressure cooker). When sipping bone broth made from grass-fed animals you'll be consuming gut-healing compounds like collagen and glutamine. It's also packed with important minerals and electrolytes. If you don't want to make your own here are some recommended brands that you can find in stores of online: Bonafide Provisions and Kettle and Fire.

5) SLEEP...at least 7 hours per night.

Yes, it's simple: our bodies were designed to recharge through restful sleep. It's hard-wired in; you need to sleep in order for your organs to function properly. The experts say to aim for at least 7 hours of uninterrupted sleep, but 8-9 is ideal. If you have trouble falling or staying asleep check out these tips.

HOW I FIGHT COLDS & ILLNESS

In addition to the items above, I am currently fighting my congestion cold with:

1) Vitamin C - I’ve increased my consumption of citrus fruits and bell peppers, as well and take a quality supplement.

2) Zinc - may help reduce the length of the cold. Only take when you feel a cold coming on though as zinc competes with cooper and you don’t want to deplete your cooper stores.

3) Echinacea - is an herb that has been used in medicinal remedies for centuries. It works to fight infections. At the first sign of a sore throat or cough I take a dropper full in a bit of water (you can put it in tea or juice if you wish).

4) Teas - I like to add lemon or honey to tea as these both help sooth my throat. This lemon ginger tea is great as well as this echinacea elderberry tea. If I wasn’t nursing right now I would make what I call my “cold shot”. I take the juice from 1/2 a lemon, add 1 TBSP honey, 1 large garlic clove minced, and 1/2 TBSP apple cider vinegar. Stir and chug…it’s gross but I swear by it. I just know that eating raw garlic right now would really upset Eli’s tummy.


Eli's Birth Story

IMG_7181.jpg

We welcomed our son, Elijah Paul, into the world on September 16th at 6:16am. I wanted to record his birth so that I could share this special story with Eli someday; as well as, help inform and inspire other mamas in their own unique labor and delivery.

The last 4 weeks have flown by with little Eli by my side! Every day we are both learning and growing together. As a first time mom, I keep telling myself to have grace and patience as we figure a new life out together as a family of three (Ember says family of four) and so far things are going well! 

Preparing for An Unmedicated Birth

Since birth stories were fundamental to learning about labor and delivery during my pregnancy, I wanted to record a fairly thorough account of our story in hopes of helping someone else along the way. I listened to a ton of podcasts featuring birth stories and read a lot of blog posts. I truly feel that others’ experiences, opinions, and circumstances helped prepare me better than any birth class would have. Instead of fearing birth, I was eager to put all my knowledge and mindfulness practice into action! For those of you who have never really read or listened to a birth story, this is your forewarning that I go into great detail so take it as you wish.

To help prepare for birth I read the books Ina May’s Guide to Childbirth, Mama Natural’s Guide to Pregnancy and Childbirth, and Birth Without Fear. In addition, I watched YouTube and Instagram videos of births, and listened to podcasts on pregnancy and birth (some of my favorites: The Birth Hour, Birthful, The Birth Kweens, Evidence Based Birth, Fear Free Childbirth, and To Birth and Beyond). Once I found out I was pregnant, I knew right away that I wanted to look into midwifery care as my primary support. The UW Midwives were wonderful throughout my entire pregnancy; I felt heard and well cared for. After doing some research and reading, I decided I’d try my best for an unmedicated birth. I fully support the use of epidurals and other medications for those that choose or need them; I just felt going unmedicated was most ideal for me and my baby. NO MATTER HOW YOU BIRTH IS NATURAL AND BEAUTIFUL MAMA!!

Early Labor

Let’s get to the actual labor and delivery! On Sunday September 15th, Alex and I were going about our normal Sunday afternoon activities of cleaning and meal prep. I had been feeling a bit more cramping and Braxton hicks (BH) contractions happening the previous 2-3 days, but on Sunday they seemed a little more frequent. I was distracted by cooking and really didn’t think much of them until around 5:30pm. I started tracking them a short while later using the app Full Term and realized there were about 10 minutes apart, but the duration of the contraction was all over the place. I couldn’t really determine when the contraction stopped as the “pain” (more just sensation at this point) was minimal and fizzled out with unnoticeable stopping points. I had been texting my sister (a mama herself) and she agreed that I should jump in the shower and then try to lay down and go to sleep. If they were real contractions I likely wouldn’t be able to fall asleep, but if there were just BH contractions I’d sleep through them and wake up Monday like nothing happened. So I did just that.

I was in bed around 8:30pm and tried to sleep. I could still feel something happening in my uterus, but again, it wasn’t painful just annoying. I didn’t end up falling asleep and by 10:30pm I decided to get out of bed in order to let Alex sleep better. I went downstairs to recline on the couch and started tracking the contractions on the app again. At this point they were lasting almost exactly 1 minute and were coming every 4-6 minutes. I had to close my eyes and slowly breath through them, but the incline of the couch was much better than laying flat. For the next 2 hours or so I went from the couch, to the bathroom, to the living room floor trying to get through the contractions by slowly and deeply breathing out with an open mouth. Leaning over the counter in the bathroom or kitchen table was also comforting. Other helpful positions were child’s pose and rocking on all fours on the ground. 

Active Labor

By 11:30pm the contractions were roughly 3 minutes apart so I decided to wake Alex up and tell him that I needed him and maybe he should finish packing. I collected all my bathroom items and he loaded the car up. I called my midwives at 11:55pm and was thinking they would tell us to come in since my contractions were only 3 minutes apart. BUT, after conversing for a while the midwife thought it would be best if I wait it out a bit longer at home where I was comfortable and more relaxed. In the end, I’m glad we stayed home longer, but in the moment I was a bit frustrated. I think what triggered her to have me stay home is that I told her that “either I have a high pain tolerance or the contractions weren’t as intense as I was expecting”. 

So, we stayed home another 2.25 hours. The midwife had suggested I try taking a warm bath. I had been texting with my doula as well and she had said the same thing, so I started filling the tub (super glad I had thoroughly cleaned it the previous week!). I brought in our touch dimming light from the baby room and set it to low light. The tub wasn’t as much relief as I had hoped for unfortunately. I really wasn’t able to relax at all during contractions (I think because I was more in a supine position), and I only stayed in the water for 10 minutes.

I went back downstairs since the couch and floor had been more relaxing. Ember, our dog, was downstairs by this point and I remember her giving me this look like, “mom, what are you doing...I want to sleep!” In the moment, it made me smile and laugh (she is pretty good at doing that). At this point, sitting wasn’t comfortable so I was going from the toilet to leaning over the bathroom counter, to leaning over the kitchen table, to child’s pose, to all fours on the living room floor. Alex was timing the contractions at this point, as well as offering me water.

Walking and staying active was what felt best. During breaks, I was drinking water and trying to slow my breathing down. One thing I had learned in my preparation was to not tense up, and instead really blow out as much air, fear, and anxiety as possible with open lips. In addition, using low groaning or moaning sounds instead of shrieks or screams was going to help progress things better. So this is what I did! By 1:30am or so the contractions were 2.5 minutes apart so we called the midwives again as I was really getting anxious and didn’t want to have a baby in the car. Alex had to do most of the talking as I couldn’t talk during contractions. The midwife listened to me breath during contractions and asked us a few questions that I don’t really recall. I just remember being frustrated because she wasn’t being very direct with us and was more or less giving us the choice to come in or stay at home and have our doula come help me labor a little longer. I just needed someone to tell me what to do at this point! Finally, Alex told the midwife we would text our doula to come over and then play it by ear and come in when we felt we needed to. Alex texted Angie, our doula and she said she’d be on her way. Well, within the next 15-20 minutes I had what they call the bloody show (blood and mucus that comes out usually in early labor). Also, I should note that my mucus plug had started coming out on Saturday, September 7th. I was so relieved when I saw blood; this was a sign that things were heading in the right direction! I literally shrieked with joy in the bathroom and Alex laughed. I think because my water had not broken yet and/or there was no blood previously, my midwife felt we were safe to stay home. This blood was my sign to get my butt to the hospital! We told our doula that we were heading to the hospital and to meet us there instead.

I waited until right after I had a contraction to get into the car, hoping I’d have less of them in the car. It was super foggy out, so of course Alex couldn’t drive that fast. I had like four contractions in the car which were super fun...not!! My sister had previously advised me to go in the back seats and stay on all fours so that’s what I did while leaning over the carseat. 

We got to the hospital around 2:45am. Alex dropped me off on the main level where I waited for him to come in, while leaning over a bench and having a contraction. As we walked over to triage, we saw our doula, Angie, who was with us from that point until 2 hours or so after Eli’s birth. I asked Alex to check me in as I felt like the contractions were coming so frequently, and I really couldn’t keep my eyes open or talk during them. We had to wait a bit for a nurse to come get us and bring us back to a triage room. They started taking my vitals right away and strapping two monitors on my belly to see how baby boy was doing. I didn’t want to lay down so they let me stand up, which was a relief as breathing while leaning over during a contraction was the only, somewhat, tolerable position at this point. My midwife, Hannah, came in and talked to me briefly (much of which I don’t recall). She asked if she could check me and said she could do it while I was standing as long as I could spread my legs some. She said I was dilated to a 6! What a relief!! The nurse asked me some questions and continued monitoring my contractions and baby. It felt like we were in this triage room forever, but according to Angie, it was a lot shorter than most of her previous encounters. At some point, I asked Hannah if there was a water birthing room available and she said she thought so! I remember being very grateful at this point as it was my dream to at least give water birth a try (but I also had a healthy understanding that it may not be right for me and/or baby). They called up to the delivery floor to have them start filling the tub with water. After some more contractions, during which Hannah and Angie offered counter pressure on my lower back and hips, I walked up to my delivery room with Alex, Angie, and Hannah by my side. The whole time from being in the car to walking to my delivery room, my eyes were closed during contractions; I really felt like I was in another world. I could have cared less about what I looked like or sounded like!

IMG_6968.jpg
IMG_6977.jpg

The room was quiet, dim, and sparkled with Christmas lights. Just what I had envisioned! I didn’t waste any time, stripped down to my sports bra and got in the tub with the help of Hannah. What a relief! The warm water felt so good this time. I had a few contractions in the tub on my hands and knees as well as leaning over the edge of the tub while on my knees. The water really helped me open up more and also relax between contractions. Even though I was in a tub that was probably 7 feet by 4 feet or so, I didn’t feel restricted in my movement at all. I went from a more reclined seated position, to my knees, to leaning over the edge with new contractions and kept moving until I was somewhat comfortable during breaks. Alex read affirmation cards I had prepared Sunday evening out loud to me and this was a lot of encouragement. All the while, my doula was whispering words of encouragement, telling me to slow my breathing after a contraction, stay relaxed, and to not be fearful. At some point, I asked Angie to put on my worship playlist for some background noise. As the contractions intensified, I found myself groaning, moaning, and almost roaring through them. In all honesty, I felt very primal and was in a deep, deep zone of my own. During the moaning, I had what I would call an out of body experience where my body just took over and pushed my baby down. It was like my vocalization and contraction were working together to bring him down. I was not physically pushing at this point. Although, after a few intense contractions like this, my body was instinctively telling me to bear down and push through the contraction.

IMG_7012.jpg
IMG_7041.jpg

The Pushing Phase

I followed my instincts and pushed with each contraction. My midwife, doula, and nurse all seemed to recognize this and said I was doing awesome. I remember Hannah saying, “You are such a strong mama, you got this girl” multiple times. At some point, Hannah asked me to step out of the tub and go sit on the toilet (which was only 5 feet away) to help me better feel what “pushing through my bottom” felt like. She kept saying I was pushing too far forward and using too much of my chest muscles (thank you CrossFit ha!). Once on the toilet, it was much easier to understand what she was talking about. It literally felt like I was trying to take the largest dump while pushing out a bowling ball at the same time (you’re welcome for that picture).

I went back to the tub and pushed with the contractions while seated back and grabbing the hand holds that were built in, then would move to all fours or leaning over the tub once more. Again, Hannah was saying to push through my butt, which I felt like I was doing but apparently not effectively enough. Hannah had me go back to the toilet for a few more contractions/pushes. This time, Alex was standing right in front of me, and I leaned my head into his stomach while gripping onto his hips for dear life during a contraction.

Now back in the tub, I remember saying out loud to myself a few times, “YOU CAN DO THIS KELSEY!” and everyone else would say, “YES, YOU CAN!” I know my preparation really helped me stay positive. I never once thought about pain relief, but the last hour of pushing I definitely thought it was getting too intense and difficult. Everyone was so good at offering me water and placing cold wash clothes on my back and forehead. At some point during a contraction, my midwife told me to reach down and touch my baby’s head as he was crowning. It was so surreal! As is natural, his head went back up slightly after pushing, but I knew this was good and ok as it was slowly stretching my perineum so it wouldn’t tear. Hannah had me keep moving around and push in different positions to help open my hips more. 

At some point near the end of the pushing phase, I could really feel the “ring of fire” as his head was slowly getting deeper. I had read and heard others’ experience with the ring of fire pain, but I was not prepared for how long it lasted for me. It was so intense and I kept saying, “ouch, ouch, ouch”. It was hard to stay focused on my breathing and vocalization at this point because of the firey pain! This was by far the most difficult part of labor for me. I think this lasted for 10-15 minutes or so and of course was more and more intense with every push. 

IMG_7060.jpg
IMG_7072.jpg
IMG_7066.jpg

The baby’s heart rate had been slowly dropping as he was in the birth canal, and I could sense more of an urgency from Hannah to get him out. She told me to stand in the tub and try pushing. Deep down I knew my baby was going to be ok, it was like God was reassuring me he was fine, but I also really, really wanted him out of me so the ring of fire pain would stop. This gave me more motivation to really bear down and push. For the next two contractions I was in a Captain Morgan type stance, with one leg up on a ledge in the tub and the other on the tub’ floor. I pushed really deep through my bottom and held the push way longer than prior pushes (I learned this was what I lacked earlier). I basically pushed until I had no breath left (maybe 1-2 pushes per contraction, where the other contractions I had 2-4 pushes). This left me totally depleted as I was using every muscle in my body and squatted into the push. During my last contraction, the nurse and Hannah were saying that he was coming and to keep pushing! The next thing I knew our son was born!! He came out all at once, which I was so thankful for. Hannah caught him since I was standing/squatting and pulled him through my legs and handed him to me. To be honest, I was so relieved that he was out and the pain had somewhat subsided that I forget what my initial reaction was. I do remember saying, “He has so much hair!,” something I was not anticipating at all since I was bald as a baby. Hannah told me to recline down back into the water so he’d stay warm. At this point I remember looking him in the face as he was screaming on my chest, and thanking God that he was healthy and strong (something I had prayed for every day of my pregnancy). God is faithful! Alex was near my head and touching Eli and said something along the lines of, “Our son is here!” I remember calling Elijah by his name as I was trying to reassure him that all was ok, and it all felt like a fairytale! They waited for Eli’s cord to stop pulsating (per my request) before Alex cut the cord.

The “Afterbirth”

I feel like it was 5 minutes or so later that Hannah asked me to stand up slowly. She pulled slightly on the cut cord to see if my placenta was ready to come out. It was, so she told me to bear down one last time, it slipped right out into the water with the strangest sensation but didn’t hurt at all (much to my surprise). Eli and I walked to the bed where I laid down to be checked and do more skin-to-skin. Eli started moving his head towards my breast right away! Angie, helped guide me and talked through some breastfeeding tips. Apparently, I had lost more blood than they were comfortable with, so Hannah asked if it was ok to administer the shot of Pitocin I had declined (unless addressed with me prior) in my birth preferences. I agreed. I kept looking at Eli in awe and shock that he was here, paying little attention to what Hannah and the nurse were doing. My bleeding didn’t slow down much so they said starting an IV of Pitocin was procedure at this point. Of course, I didn’t want to bleed out any more so I agreed. This is literally the only thing that went astray from my “loose birth plan” so I am really grateful. Hannah said I didn't have any perineal tears which was a big relief considering how much the crowning phase (ring of fire) burned. I just needed 3 separate stitches in my labia, nothing major at all! (I considered not sharing this part of our story on the internet, but it is all part of the birth process and I would like to be real and honest to help normalize birth).

Between Hannah cleaning me up and putting the stitches in and the cramping in my uterus from the Pitocin, I was NOT comfortable. They call the cramping pain associated with the uterus shrinking and riding of blood/fluid the “afterbirth” and it is REAL. I was not prepared for how intense this pain would be. The IV Pitocin definitely intensified this and I had to close my eyes and breath through the cramping for a bit. It made my bonding time with Eli not as pleasant and I wish they could have slowed down my IV, which my doula suggested I inquire about, but the new day shift nurse said she couldn’t and that it was procedure to let it run at the rate it was at for the full 30 minutes. I didn’t quit feel heard, but this is literally my only complaint of the whole hospital experience so all-in-all I was treated very well. I think if my midwife would have still been in the room, when I inquired, things would have been handled differently. I will likely ask about this at my 6-week postpartum appointment, so I know for next time should this arise again.

IMG_7094.jpg
IMG_7119.jpg
IMG_7134.JPG

Eli, Alex, and I got to hang out for a good while. Eli was nursing (or learning to) the whole time and we eventually ordered some breakfast. After 1.5 hours they weighed and measured Elijah. He was wrapped in a swaddle and Angie gathered all our things so we could be transferred to our postpartum room. A little while later we were transferred and then left alone, just the three of us, our new family! Those first snuggles were glorious and so sweet! Birthing a child is so, so beautiful and definitely a work of God. Every baby is a true miracle! I’m forever grateful for our birth experience and truly blessed to be able to hold a beautiful, healthy baby. I’m soaking in these first weeks, as should every mama, especially the little fingers, feet, noses, and squeaks.

*Special thanks to my wonderful team: Alex (my supportive husband), Angie (Align Doula Services), Hannah (UW Health Midwifery), and the nurses at Meriter Hospital in Madison, I could not have done this without all of you!!

Hite Nutrition Costco Recommendations

As a frequent shopper at Costco, I often refer my clients to products I personally use from Costco, so I thought I would share a few of "my favorites" and some Hite Nutrition recommendations. There are many things to love about Costco. They focus on products that offer quality ingredients and are often organic or made with less preservatives. And most prices are comparable or cheaper than what you can get in a normal grocery store for the same quantity (excluding some produce). I know some of you may not have a Costco located near you so I have included a direct link to Amazon for some products that are available online. Those of you who have Amazon Prime this is another great option! I have found that most items at Costco are priced better in store than on Amazon, but you're paying for the convenience of having it delivered directly to your doorstep. If you have any questions on any of the products I recommend just send me an email at kelsey@hitenutrition.com or find me on Instagram @hitenutrittion and send me a message.

hitenutrition.com (1).png

Power Up Trail Mix is a combination of walnuts, dried mango, almonds, and dried cranberries. This makes the perfect afternoon snack!

I love RX bars! They have more protein than most bars, super simple ingredients, and are gluten-free.

IMG_6547.jpg

These Bare organic apple chips are a great snack option for kids and adults alike! They are bit pricier so may be more of a treat once and while but definitely Hite Nutrition approved! I also recommend the dried dates, figs, mango (brand with no added sugar), and prunes at Costco for a healthier sweet snack option.

Harvested for You Organic Shelled Pumpkin Seeds come in a 20 ounce bag and is a great value for the quality! A single ounce serving is a great source of zinc, magnesium, manganese, phosphorus, vitamin-k, and plant based omega-3's.

I personally have not purchased these Caveman Bars yet (more for a budget reason than anything), but I have sampled them and they are delicious! I love that these are dairy and gluten-free. I would consider these more of a treat as they only have 5 grams of protein, but nonetheless they are made with natural ingredients and are healthier than most convenience bars.

Screen Shot 2019-07-31 at 2.45.30 PM.png

These are a more recent find at Costco! They are Paleo (gluten and dairy-free) and taste decent. Great for a snack or addition to breakfast.

Larabars are a great item to grab when you need an afternoon pick-up! They often contain less than 5 ingredients and are super delicious because they are sweetened with dates.

Rw Garcia 3 Seed Sweet Potato Crackers are just as delicious and another great alternative to oily chips or crackers.

For those of you who don't necessarily love eating vegetables daily, I suggest adding this Organic LIVfit Superfood Blend into smoothies, baked items, and/or protein shakes to get some added nutrients.

Plum Organics is a great company that makes healthy snack and mealtime options for babies and toddlers. Costco carries their Mighty 4 product which is a squeezable pouch of Greek yogurt, a vegetable, a fruit, and a grain.

Hemp Hearts are raw shelled hemp seeds that are a great addition to any smoothie. Or try topping your oatmeal or yogurt with hemp seeds for some added protein and fatty acids! 

Earthly Choice Wild Rice is always a great addition to a quick dinner meal. This price is for 3 lbs and is comparable to other grocery stores. Email me if you need tasty ideas on how to cook wild rice!

I love adding chia to my smoothies or making chia pudding! Since this is a rather large bag I keep it in my refrigerator. Chia seeds are a great energy and metabolism booster, and they contain beneficial amounts of fiber, protein, and omega fatty acids. Give Nature's Intent Organic Chia Seeds a try!

The same goes for wild-caught canned salmon. Kirkland's canned salmon is a great source of protein! I use it on salads, in salmon patties, and creamy cold salmon salad.

Kirkland Organic Coconut Oil is cold-pressed and unrefined which I love. My husband and I make our popcorn with coconut oil so we really appreciate a cheaper organic brand. 

IMG_6579.jpg

If you follow me on Instagram, you’ve heard me talk about sardines a lot! They are one of the most nutrient dense foods and a great source of omega-3’s and DHA which we could all use more of (especially babies, toddlers, pregnant and breastfeeding moms). I drain these and mix them into a salad or mix them with mayo, dried dill, parsley, garlic, and onion powder to form a tuna salad like mixture for crackers or on top of a bed of greens.

Almonds are a common snack in my diet as they are a good source of plant protein and minerals such as vitamin E, manganese, biotin, and copper. This Kirkland bag of almonds is cheaper than most other grocers.

Chosen Foods Avocado Oil is great for high heat stir-frying or roasting. I also love making homemade mayo with this!

Stober Farms Organic Golden Flax Seed is a great addition to smoothies, baked goods, and oatmeal. Flax seed is high in omega-3 and fiber. In addition, studies show that it may help reduce the risk of heart disease, cancer, stroke, and diabetes.

In addition, I recommend trying the frozen Kirkland Wild Alaskan Pacific Cod. You should try to eat two servings of fish a week!

BACON! Who doesn't like bacon? I never use to eat it because it was "bad" for you, but then I discovered there are more natural sources without nitrates/nitrites. And if you don't have any heart complications, a little saturated fat is actually healthy for you! Go ahead eat some nitrate-free bacon here and there. Coleman Natural is a brand I recommend.

Coleman Natural chicken breasts are individually packaged for easy thawing and have no added salt. Although they are not raised organically, the chickens are not treated with antibiotics, hormones, or steroids. 

These Kirkland Organic Tortilla Chips are recommended because when purchasing corn products you want to buy organic in order to avoid any GMOs. Although these are made with vegetable oils (canola and safflower which I try to avoid) they are ok here and there or for parties.

Plainville Farms Oven Roasted Organic Turkey Breast slices are amazing! Yes, this product is more expensive than most sandwich meats but in my opinion it is worth the cost. The turkeys used have never been give antibiotics, are raised organic, and the deli slices do not contain any nitrates or other harmful preservatives.

These fresh Coleman Organic Chicken breasts are great if you have a larger family and want to buy safer chicken. The breasts are fairly large so I recommend cutting them in half and freezing them in quantities that work well for your family.

IMG_6561.jpg

If you’re looking for an easy meal option this kielbasa is great! It’s organic and grass-fed. I freeze whatever I don’t use in the first meal so it lasts longer.

img_4482.jpg

This sauerkraut is AMAZING! I started incorporating more fermented foods into my routine a few years ago and haven’t looked back. Naturally fermented foods have the good probiotics our gut needs to stay healthy. Probiotics provide bacteria that helps increase immunity, digestion, and the gut’s health. Other great fermented foods to add to your routine are: a quality yogurt, kefir, and/or kombucha.

coconut milk.jpg

If you are sensitive to dairy, canned coconut milk is a great alternative in most recipes! The Thai Kitchen brand at Costco is organic and a better price than other grocery stores near me.

Costco-633561-Kirkland-Signature-Organic-Diced-Tomatoe.jpg

If you purchase organic canned items, they are definitely a better price at Costco (at least in the Midwest). I always have a stock off organic diced tomatoes, tomato paste, and tomato sauce in my pantry so I don’t have to spend the $0.50 it can cost for a can at my local grocery store.

09xzedj31g631.jpg

Spindrift and other sparkling waters like La Croix are great alternatives to soda and even artificially sweetened beverages like Crystal Light. Costco definitely has most other grocery stores beat on sparkling water costs!

IMG_6573.jpg

I prefer to purchase grass-fed butter and Kerrygold has a great, rich flavor. Costco definitely has the best price! I don’t use a ton of butter so I freeze what I don’t need. This can be stored on the counter of in the fridge for daily use though.

Mary's Gone Crackers are a great alternative to those canola oil, preservative packed crackers you may have in your pantry. They are gluten and dairy-free and made with whole-grain brown rice, quinoa, flax seeds and sesame seeds. Try them plain, with hummus, or goat cheese!

Screen Shot 2019-07-31 at 2.46.00 PM.png

I love these gluten-free crackers. They are made with almond flour and minimal ingredients. Costco’s price is better than most other grocers.

Any applesauce that is unsweetened is fair game; especially organic! You'll have to do some price comparison with your local grocery store to see if this Mott's Organic Applesauce 36 unit package is a deal or not. 

GoGo Squeeze is a great quick and natural snack for your kids to eat on the go!

Chosen Foods Avocado Oil Mayo is dairy, soy, and canola oil-free! It has the same ingredients as what I put into my homemade mayo. Please note that this product is significantly less expensive in other grocers.

GoGo Quinoa makes an Organic Macaroni out of red and white quinoa that is totally gluten-free and a healthier pasta option. Once again this product is far cheaper in stores. 

QUINOA!! One of my favorite superfoods! Kirkland's Organic Quinoa is a great deal and since it's pre-rinsed it's super quick to cook up. 

IMG_6369.JPG

I know what you are thinking...really, canned tuna? Yes! I don't mind the smell and love the flavor, so I add tuna to my salads and casseroles for a great source of DHEA and omega-3's. This is a cheaper source of protein. For the best quality go for the Wild Planet brand available at Costco, as it is sustainably sourced from wild-caught tuna.

Kirkland spices are a great addition to your pantry. I always keep Kirkland Ground Cinnamon and Kirkland Garlic Powder stocked. They are a great quality for their price (definitely cheaper in store than online). 

Almond flour is a stable in my pantry for Paleo treats. This Blue Diamond Blanched 3 lb bag is a steal and I cannot find anything cheaper, but unfortunately they do not offer this price online. *update: Kirkland now offers their own brand and is sold at Costco, still a great deal!

Angelic Bakehouse is a bakery that sells sprouted bread products in the form of sandwich bread, buns, wraps, pizza crust, and crisps. Why sprouted bread? Sprouting grains prior to baking allows our digestive system to more easily break down the grain and absorb more nutrients. Costco now carries their sandwich bread in addition to these Premium Wraps!

If you eat oatmeal, I suggest trying a steel cut oatmeal as the oats are simply cut open and never steamed or rolled. McCann's Steel Cut Irish Oatmeal is great because it doesn't take as long to cook as other brands.

Mmmm...almond butter! It's just so good in everything! I don't recommend buying this online as it is far cheaper in store. 

When purchasing seafood always try to buy a wild product as farm raised fish will not be as nutritious. Kirkland's Wild Alaskan Sockeye Salmon tastes great and is fairly comparable to other grocery stores.

Kirkland's Greek Yogurt is organic and a great price for the quantity if you have a family you likes Greek yogurt.

I love this triple berry frozen blend from Costco. I add them to smoothies, yogurt, and oatmeal.

large_5da22244-cafe-4ee7-9dd9-0b5e6a410d38.jpeg

Jones Dairy Farm chicken sausage is a great option as it has zero added sugars and the links are already cooked. They have a pork sausage link as well that is good it just has added sugar, but Hite Nutrition approved when eaten in moderation.

Ezekiel 4:9 Sprouted Grain bread is similar to Angelic Bakehouse in that they sprout the grains prior to baking, thus more nutrients is absorbed by our digestive system. This bread is found in the freezer section at Costco.

Ground turkey is a great way to mix up your protein source and this Butterball Farm to Family ground turkey is all natural (no hormones or antibiotics) and is 93% lean. *My local Costco now carries an organic brand that is fairly reasonable!

I made the shift to buying more organic and grass-fed beef a few years ago as its better for animal welfare, the environment, and health.This pack of three makes about four 0.90 lb meals of meat if you divide it prior to freezing. *Recently, I have also been supplementing with local farmers and a service called Butcher Box that delivers grass-fed, pasture-raised, organic meats to my door.

Screen Shot 2019-07-31 at 2.45.00 PM.png

These larger chicken sausage links are a great quick addition to lunch or added to pasta/veggie skillets for dinner. I love the flavor! They are made with minimal ingredients and are organic and paleo (gluten and dairy-free)!

IMG_6563.jpg

Have you heard of Perfect Bars?? They are so good! They have more nutrients and protein than most bars, because they are packed with over 20 fruits and vegetables (but you’d never know it from the taste). This is a great price compared to buying individual bars at most other stores. They are found in the refrigerated section at Costco and should be stored cold, but will last up to 24 hours without refrigeration (ideal for hikes/lunch on the go/snacks).

a581ef328aec1a93d98477f6c781f799.jpg

These organic black beans are great to have on hand as well for adding to chilis, burrito bowls, and veggie skillets. They are a good source of additional protein and healthy carbs!

IMG_6580.jpg

I love this Kirkland marinara. It is organic, tastes great, and has no added sugar or nasty oils (simply olive oil). It’s especially great if you have a family as the jars a slightly larger than most.

How to Meal Plan and Prep Like a Boss

It's the beginning of a new year and like most of you, I am thinking about ways I can better myself in 2018. The beginning of this year has been a little different from past ones. I didn't make a list of resolutions like I have done previously, instead I am focusing on a few major intentions I've set for myself. Since I'm all about transparency, let me share these personal intentions with you so you can help hold me accountable. 

1) Invest more time into loving myself (key word: ACCEPT)

2) Worry less, enjoy more (key word: RELAX)

3) Spend time making nutritious food (key word: MEAL PREP)

4) Treat my body with respect and keep working towards better health (key word: RESPECT)

5) Love and care for those around me with intentionality (key word: LOVE)

The truth is, when I put myself first and take care of my needs by showing self-love, taking more time to relax/play, and devoting time to bettering my health through eating well, working out, sleeping more, and listening to my body, I have more genuine energy to love those around me well. Like me, I am sure some of you have chosen to focus on eating more nutrient dense, wholesome foods or maybe you've chosen to cook at home more often and eat out less. With this in mind, I thought it would be the perfect time to break down how I meal plan and prep on the weekends to help set myself up for success.

Step 1) PLAN

I know it sounds obvious, but without a plan you're going to spend a lot more money and time buying and preparing food.  A lot of people simply head to the grocery store and think they will be inspired by the produce they see or simply try to "wing it", but that leads to higher grocery bills, little motivation, and vegetables rotting away in the refrigerator a week later. You see, meal planning is a crucial step to eating healthier on a budget! Here's my advice:

- Take inventory of what you already have on hand. Look through the refrigerator and freezer to see what produce and/or meat needs to get used up. This will help reduce waste and save money.

- Dedicate a certain block of time each week to browse your favorite websites, cookbooks, or Pinterest for recipes and/or ideas.

- Choose 4-6 meals for the week (depending on the size of your family). Choose at least 1 breakfast option, 1 lunch option and 2 dinner meals that you'll have leftovers from. A time saving trick when planning meals is to factor in at least two meals that use the same meat. For example, plan to slow cook a pork roast and use the pulled pork for tacos as well as served on top of sweet potatoes. Also, you don't always have to follow a recipe; simple meals are often better for people new to cooking. For example, lunch may simply be some grilled chicken with steamed broccoli and a baked sweet potato topped with coconut oil. Since I'm a nutritionist, I feel obligated to say something about seafood. If you like seafood try to aim for 2 servings of fish a week. There are some major nutrients in seafood that we don't get from other meats and it's important to keep variety in our diet. Otherwise make sure you're taking a quality cod liver oil supplement 3-4 times a week (the ones from generic stores aren't well sourced and could be doing more harm than good). 

IMG_8765-e1514494279774.jpg

- Write out your grocery list. Multiple any recipes that need it in order to accommodate your family size; remember to bank on at least two leftover dinner nights. Break your list up by departments in the store (produce, dry goods, spices, dairy/eggs, meat, and freezer) to save time from running back and forth. I like to use the list app on my iPhone for groceries so I can check off that I've put the item in my cart and not have to carry around a pen and paper in the store.

- Next, formulate a plan for prepping your meals. Some tricks I generally use: If something needs to bake, start that recipe first so it can bake while you work on another recipe. Chop or dice all your vegetables (from all recipes) at one time and use designated prepping bowls. You'll save time by washing and chopping everything at once. If you have a slow cooker or Instant Pot recipe chosen for the week that you want to wait to make, prep as much as you can in advance, and store it in a large container or plastic bag so that you can easily start the slow cooker before work or cook the meal the evening of. Also, you don't have to prepare all your meals in advance. It's nice to save 1-3 dinner meals so you don't feel like you're eating leftovers every night (that is if you have time to cook during the weeknight).

- Set a date with your kitchen to meal prep. If you tend to get burnt out from grocery shopping, maybe it's best to shop and meal prep on separate days. Do what works best for you!

- Double check that you have the proper storage containers for your meals. 

Step 2) TAKE ACTION

This is the part where most people stumble. You've made a plan and now it's time to execute it! You can do it! I promise the more times you stay true to your plan and follow through, the easier it becomes.

- Go shopping! Either physically go to the store and purchase your items, or shop online using the many online grocery shopping features.

- Start chopping, dicing, cooking, and baking! Follow the plan you formulated and use the designated time you've set aside to prepare your meals.

- Store meals in ready-to-go containers so you have less to deal with in the morning. If you have breakfast and lunch already portioned out you're more likely to actually eat it, and you'll be less frustrated when you chose to hit the snooze button in the morning.

This may sound like a lot at first, but I promise you that it gets easier! Remember if eating healthy and nutritious meals is a priority of yours, meal prep should be a blessing not a dreaded chore. If you've chosen to meal prep more often this year, I'd love to hear how it's going. Comment below or email me any questions you may have. 

5 Foods I Try to Eat Daily

1) EGGS

Not only are eggs one of my favorite foods, but they are super beneficial to helping the body function optimally. The yolks are very high in healthy fats and protein. For every 100 grams of eggs you eat you are getting 11 grams of saturated fat and 12.6 grams of protein. The yolks are rich in vitamins A, B2, B5, B12, D and choline; as well as phosphorous and zinc. Although there is a fair amount of cholesterol in the yolk, this cholesterol is not linked with serum cholesterol (which is the cholesterol that doctors are concerned with). It’s a huge myth that eating egg yolks daily will raise your cholesterol! In fact, taking in cholesterol actually helps the liver out! You see, the liver actually has to produce cholesterol every day, but if we eat some through natural foods it has to produce less. When purchasing eggs, the best choice are those from a local farm that do not feed the chickens soy or corn meal. Chickens are grazers and should have access to roam and eat grass and insects. The best eggs are going to be organic, pasture-raised from a farmer you can trust. Eggs range a lot in price based on the quality of the environment the chickens are in and what they are eating. My advice is to find a local farmer (most farmers are cheaper than in-store prices) or buy eggs at your local farmer's market for optimum nutrients. The color of a yolk says a lot about it's nutrient profile, the darker orange (verses pale yellow), the more minerals and vitamins you will be eating! To find a local farm near you click HERE.

eggs.jpeg

2) Spinach or Kale

Eating some form of dark leafy greens every single day is a good habit. Spinach is packed with iron, folate, B-vitamins, calcium, magnesium, and many others! Kale is rich in vitamin K, C, E, B2, calcium, potassium, iron, magnesium, and fiber. All of these are vitamins and minerals our bodies need to function optimally. Leafy greens will also help your liver detox all of the junk it absorbs from nutrient poor foods, pollutants, chemicals, and alcohol. I highly recommend buying organic greens as the leaves of plants have direct contact with any pesticides used on non-organic plants. Some easy ways I incorporate dark leafy greens daily include: adding 1 cup of sautéed spinach or kale to my frittata for breakfast, sautéing kale to go with fried eggs, adding 2 handfuls of spinach to a smoothie, or eating them as the base of my salad for lunch.

3) Collagen  

This is a more recent addition to my routine and I’m definitely seeing results. Collagen is a type of protein that makes up a lot of our hair, skin, nails, ligaments, and tendon tissues. I've talked about the benefits of collagen previously in this blog post. Consuming collagen peptides helps make up for not eating animals “head-to-toe” (meaning cartilage, ligaments, or other collagenous tissues) like our ancestors use to. Collagen will help support and strengthen your joints, cartilage, nails, hair and skin. In addition, it can be beneficial in supporting a healthy gut, as it strengthens the lining of the digestive tract. Collagen comes in a powder form that is flavorless and can be added to hot or cold beverages/food like coffee, tea, smoothies, oatmeal and just about everything in between. I even have a Brownie Protein Bite recipe that has some collagen in it. Adding collagen to your morning routine will liking help keep you full longer as well. When purchasing collagen peptides make sure they are produced from grass-fed cows!

4) Coconut Oil, Avocado Oil or straight up avocado!

These healthy fats are a little controversial in the nutrition world, but a lot of research is being done and it’s showing that there is a benefit to the saturated fat from coconut and the monounsaturated fat from avocado. Saturated fat found in coconuts is made from medium chain triglycerides (MCT). These MCTs are digested differently than other fats and can be used for energy almost right away. Avocados are primarily made of monounsaturated fats, which is the "heart healthy" fat and may help lower cholesterol. Avocados are also lower in omega-6 polyunsaturated fats which has been linked to promote inflammation in the body (very BAD!). Both coconut and avocado oil are still high in fat though, so remember to limit your intake to ½-1 TBSP per sitting of these oils. One thing to mention, get organic unrefined (virgin) coconut oil, not the refined stuff!

5) Sauerkraut, Kombucha, or a probiotic supplement

Screen Shot 2017-12-06 at 7.36.37 PM.png

Raw fermented vegetables like sauerkraut can have a big impact on the health of your gut. A healthy gut is key to our overall well-being as 75% of our immune system is located in our intestines. Fermented foods like sauerkraut, Kombucha (fermented tea), well-sourced whole-milk yogurt, kefir, and kimchi are great natural sources of the healthy probiotics that will support good gut bacteria. Supplementing with probiotics either with food or in a pill form has been shown to be beneficial in a variety of autoimmune conditions like IBS, rheumatoid arthritis, MS, and autoimmune thyroid disease. In addition, restoring the balance of gut microflora has a direct effect on the tight junctions that line the intestines which can help heal leaky gut.

Resources:

https://www.ncbi.nlm.nih.gov/pmc/articles/PMC3664913/

https://www.thepaleomom.com/the-benefits-of-probiotics-teaser-excerpt-from-the-paleo-approach/

Top 5 Skincare Ingredients to Avoid

Over the past year, I have become more and more educated on the power chemicals in topical products, household cleaners, and tap water have on my health. I never really understood the impact some of these toxic ingredients had on my health and well-being. I've been suffering with some hormonal imbalances and through my own research and advice from health experts, I am now taking big steps to eliminate the toxic load my body is exposed to daily. I had never paid attention to how my deodorant, toothpaste, make-up, shampoo, dish soap, laundry detergent, or tap water may be affecting my health. Yes, overall I am a healthy person on the surface level, but there have been deeper issues I've battled the last two years and thus what led me to change some of my daily habits. 

Detox is a common word used today in the health world. We all know that toxins build up in our bodies, and that we need to get them out. But did you know that you can prevent a lot of these foreign ingredients from getting inside your body in the first place?! Conventional beauty and body products can actually be one of the greatest contributors to our toxic load. If you are a woman, think about the number of products you use in the morning. I can rattle off at least 10 I was using regularly: conventional shampoo, conditioner, body soap, face lotion, foundation, mascara, eye liner, bronzer, deodorant, and perfume. In this blog post, I'm going to specifically talk about how we can eliminate toxins from our skin. Skin is our body's largest organ and it's about time we start treating it right!

never-list.jpg

Since the beauty industry is largely unregulated (the last legislation passed to regulate the safety of cosmetics was over 80 years ago!); I have chosen to become a Beautycounter consultant in hopes of educating others on what I've learned and how to choose safer beauty and skincare products. Europe bans nearly 1,400 harmful cosmetic ingredients, yet the United States only bans 11! Beautycounter promises to never use approximately 1,500 questionable ingredients in their products. If after reading this post you'd like to learn more and/or hear about what products I recommend from Beautycounter please email me! Let's dive into five specific chemicals you absolutely want to avoid.

1. Fragrance/Parfum

I know, you just want to smell nice! But these engineered scents can have thousands of chemical ingredients (all of which are not listed on the product label). Fragrance formulas are protected under federal law's classification of trade secrets and can thus be undisclosed. Something about this just doesn't seem right!

2. MEA (Monoethanolamine), DEA (Diethanolamine), or TEA 

These are emulsifier (ingredients that prevent separation of other ingredients) and surfactants (foaming agents). These acronyms (and all other acronyms for that matter) should be avoided as toxic material. They are often found in cleansers, fragrances, and make-up. These chemicals have been linked to allergies, skin toxicity, hormone disruption, and birth defects. Not good!

3. PEG Compounds

PEG compounds (polyethylene glycols) are petroleum-based compounds that are used as thickeners, solvents, softeners, and moisture-carriers. PEGs may be contaminated with measurable amounts of ethylene oxide and 1,4-dioxane. These are known human carcinogens.

4. Phthalates

Phthalates show up as DBP, DEHP, DMP, and DEP on product labels. Phthalates are a group of chemicals used to make plastics more flexible yet harder to break. Common cosmetic products like nail polish, hair spray, aftershave lotion, and soaps can contain phthalates. With dangers of endocrine disruption, respiratory toxicity, birth defects, and infertility you don't want any of these chemicals sticking to your body.

5. Talc

For all my science nerds, talc is a mineral mainly made of magnesium, silicon, and oxygen. As a powder, it absorbs moisture and cuts down on friction. There are high health concerns of skin irritations, organ system toxicity, respiratory distress, and cancer with products containing talc. Talc can be found in baby powder, deodorant, dry shampoos, and mineral make-up. Many studies in women have looked at the possible link between talc powder and cancer of the ovary. Although findings have been mixed, with even some studies reporting a higher risk of cancer I advise staying clear of talc.

Now...the GOOD NEWS!

Safer alternatives are available and there are steps you can take to detox  and reduce your toxic exposure. I encourage you to start small and swap out one skincare product you use daily this month and another the next month, and so on, until you are confident the products you put on your skin are safe.

Check out what products I use daily HERE. And if you're interested in learning more about safer skincare and beauty, please click the button below to sign up for my "Non-Toxic Living" email subscription where I'll be sharing my favorite products, why I became a Beautycounter consultant, and exclusive Beautycounter offers I will offer from time to time only to subscribers.

Healthy Through the Holidays

With Thanksgiving less than 3 weeks away I wanted to share some tips and tricks to help you navigate through all the delicious food and treats that come along with the holidays. These 5 tips have helped me stay more mindful at parties, family dinners, and celebrations so that my health and wellness aren't compromised during the  6+ weeks of holiday festivities.

1) ALWAYS offer to bring a dish, snack, or dessert to share!

Whether it's a work party or a nice family dinner, I always volunteer to bring a dish to the gathering. This allows me the option to choose a healthier, real food item that I feel comfortable eating myself. Some of my favorites are autumn/winter salads, roasted vegetables, mashed sweet potatoes with coconut oil, a vegetable tray with hummus, fruit salad, or a Paleo dessert. I am guaranteed to eat at least one healthy item (or cleaner dessert) if I bring it, and I don't have to worry that there won't be anything healthy to eat (which can sometimes lead to giving in and indulging in all of the treats because you feel deprived).

I have linked some great recipe options to make for celebrations here:

Creamy Poppyseed Berry Apple Salad

Roasted Brussels Sprout & Beet Salad

Mid-West Winter Salad

Autumn Breeze Salad

Salmon Herbed Quinoa

Creamy Broccoli & Cauliflower Dill Salad

Dark Chocolate Coconut Bites

Paleo Pumpkin Spiced Cookies

2) Pack healthy snacks when you travel and/or stop at a grocery store when you arrive at your destination.

This tip goes for anytime of the year, but since I travel more around the holidays it is a good reminder. I like to boil some eggs a head of time and make either granola, Paleo muffins, or my breakfast cookies for both breakfast and snack options on the road or once I get to our hotel or relative's home. In addition, I pack vegetables like baby carrots, snap peas, sliced bell peppers, and cucumbers. I always bring apples as they are a fruit that travels well. Typically, I'll pop some homemade popcorn and pack that in a gallon ziplock as well (popcorn is my keep my awake snack while I'm driving ;)). Other snack items I will pack include: RX bars, Larabars, collagen peptides (to put in my tea/coffee/smoothies/water), almonds, and maybe some dark chocolate if I know I'm going to want something sweet. I can't tell you how many times I've been on a road trip and stopped at a gas-station and been tempted by all the candy, only to find there are no clean chocolate options! I stay away from all dyes and most added preservatives so gas-station food is usually not an option, thus why I prepare in advance! Of course many of these snacks would be difficult to bring if you are flying, but you can still get creative. Boiled eggs will be totally ok up to 8 hours unrefrigerated, as will most cut vegetables, and of course many fruits (apples, pears, plums, oranges, grapes, etc.) are good for days without refrigeration. If I know my husband and I are going to need to eat more than one meal on the road, I usually make tuna or chicken salad so my husband and I are guarantee some good nutrients during our drive.

Another helpful thing I have learned over the years is to not be afraid to go to the grocery store when we arrive at our destination if I have access to a refrigerator. Since I'm a huge foodie and nutrition nerd, I like picking out my own groceries and browsing stores I am not as familiar with. Some items I may pick up would include: grass-fed or dairy-free yogurt, almond milk, eggs, frozen berries, vegetables to roast, spinach for salads and smoothies, and ingredients for homemade dressing (if I don't pack it with me). These items would be for breakfast and any other meal where my family or friends aren't all eating together. 

3) Fill your plate with 1/2 vegetables, 1/4 protein, and 1/4 carbs! Skip the rolls, traditional stuffing, and green bean casserole.

If I find myself in front of a buffet of food at a party or am seated at a nice dinner with family, I ALWAYS pick out which vegetables I want to eat first. If I have the opportunity to fill half of my plate with leafy greens, salads, or cooked vegetables I will! From there, I look for the a good source of protein. This could include roasted turkey, dishes with chicken, chili with ground beef, or maybe even pulled pork if I am lucky (I love pulled pork)! Lastly, I fill the remainder of my plate with a healthy source of carbs like mashed sweet potatoes (hopefully not loaded with brown sugar and conventional butter), baked squash, or a baked potato. Since my plate is full and I know I'll be satisfied, I am way less likely to reach for the rolls, stuffing, or green bean casserole which all likely have been made with conventional butter, soup cans full of preservatives, or processed breads. In addition, these foods/dishes are typically  more nutrient poor in comparison to everything else already on my plate. These types of foods tend to be higher in poor quality saturated fat and carbs as well. Please hear me out: I absolutely LOVE my mom and aunt's homemade stuffing, and I may have a small portion because I know they use real ingredients and it isn't made from a box; my point is to not fill up on nutrient poor items. If you or someone you know has put a lot of time and love into making true homemade dishes by all means it is ok to have a small portion! I plan to try making a homemade Paleo green bean casserole this year at some point, and trust me I'll be eating a fair portion of it! This tip is more beneficial when you know the foods most likely are not 100% homemade and you are given a large amount of food options to choose from. I always encourage: 1/2 a plate of vegetables, 1/4 plate quality protein, and 1/4 plate quality carb source.

4) EAT A DESSERT OR TWO at a planned gathering!

Yes, you read that right. Please eat a treat IF you really want one! Don't deprive yourself of something that is enjoyed with close family and friends just because you are tying to be "healthy".

 I usually have a game plan of eating 1-2 small desserts per gathering IF I feel there is something worthy enough to have. That is a big IF. Let me give you an example. My mom's family is HUGE. We all get together for a Christmas lunch and there are over 60 relatives in one house! This means we have to bring a lot of food AND desserts. Typically one of my aunts makes grass-hoppers for everyone, and all the other families bring a tray of homemade Christmas cookies. By this point in my life, I have tried my fair share of Christmas cookies and know which ones I like more than others. So with this in mind, I plan to enjoy 2-3 cookies (they are small) that I know I am going to love. And yes, I mean enjoy. You shouldn't deprive yourself from something you love! The key is mindfulness, truly enjoying the treat, and appreciating the moment and holiday tradition you love. I'll probably pass on the grass-hopper this year because of the green food dye (it's not worth it in my mind), but I know I will enjoy some type of cookie with caramel and chocolate and probably a reese's peanut butter cookie. Food is meant to be enjoyed, not abused or restrictively controlled.

5) Don't over-indulge during the week.

While I do usually enjoy a treat or two at planned gatherings, it was because I planned for it and truly wanted it. I try to avoid unnecessary treats during the week, like candy sitting out at stores or offices, extravagant holiday lattes or mochas that are loaded with sugar, or treats that someone has offered me out of the blue. If I wasn't looking forward to having a treat it is 10x easier for me to pass it up. When I am able to look forward to the next social gathering, knowing I've stuck true to my healthy eating for the majority of the week I am going to get so much more pleasure out of partaking in some wine or dessert at a social gathering I have planned for.

This brings to my attention: home-baked goods. Those delicious treats that sit around most  homes the month of December are so very tempting! Whether it is leftover pumpkin pie or freshly baked Christmas cookies and fudge, treats in the house ALWAYS leave a temptation. One of my family traditions is making Christmas cookies with my mom and sister.  We spend hours baking away in my mom's kitchen signing to Christmas music and laughing. It's a tradition I truly look forward to each year. With this in mind, I have learned that when my mom sends me home with a container full of cookies I can't leave them in my house otherwise I will eat them all in a week or so! Over the years I've learned that sweets are definitely my weakness and I'll be the first to admit it. So, what do I do? I keep a few in the freezer to enjoy when I REALLY want one, but otherwise I send them all to work with my husband. He can choose to share with his co-workers or not.

Now, I understand this isn't feasible for everyone as many of you have families with little ones who would like to have a Christmas treat throughout the week. If you struggle with mindfulness around baked goods and sweets, my suggestion for you would be to have your significant other store them somewhere you don't know where the container is located. When your kids want a treat they will be able to when your significant other is able to get them one and you won't know where they are hidden. After a day or two you'll likely forget all about them entirely. Yes, this seems a little silly, but it will likely work and most likely help keep your sugar dragon away! One other tip I have; if you want cleaner treat options try out some Paleo, dairy or grain-free recipes as they will have real food ingredients that won't compromise your health as much as baked goods made with conventional sugars and flours. There are some great food bloggers out there that have amazing holiday treats. See some of my favorites below:

Shortbread Cookies by Against all Grain 

Pumpkin Pie Cookie Crisp by PaleoOMG

Seven Layer Bars by Against all Grain

Paleo Peppermint Chocolate Crinkle Cookies by the Healthy Maven

Grain-Free Apple Spice Coffee Cake by Against all Grain

Paleo Fudge by Fed and Fit

Pumpkin Bread by Clean Eating with a Dirty Mind

Chocolate Coconut Bites by Pinch of Yum

I hope these tips and tricks help you have a more mindful holiday season and new perspective  when enjoying the upcoming holiday parties and celebrations!

5 Benefits of Turmeric

What is turmeric?

Turmeric comes from the Curcuma longa plant that grows in Asia and Central America. It is sometimes known as Indian saffron or the golden spice. The golden spice that you often see on shelves is the ground roots of the plant. Ground turmeric is also the major ingredient in curry powder. Besides the spice product, turmeric is commercially available in capsules, teas, powders, and extracts.

The active ingredient in turmeric that gives the root it's unique medicinal properties is called curcumin. While turmeric has many benefits, it is only 3% curcumin by weight, and thus in order to get a more concentrated form curcumin supplements are often used.

5 Health Benefits of Turmeric

1) A Natural Anti-inflammatory Compound

2) Increases the Antioxidant Capacity of The Body

3) Can Help Prevent Cancer

4) Helpful for Arthritis

5) Protects the Heart

1) A Natural Anti-inflammatory Compound

Although acute (short-term) inflammation is crucial and necessary to fight of infection and pathogens, it can become problematic when it is chronic (long-term) and starts fighting against the body's own tissues. The majority of Western disease stems from low-level inflammation. This includes diseases such as cancer, heart disease, metabolic syndrome, Alzheimer's, and various degenerative conditions. This is where turmeric and cucumin play a role. Curcumin is strongly anti-inflammatory and has been shown to match some anti-inflammatory drugs by fighting inflammation at the molecular level. 

2) Increases the Antioxidant Capacity of The Body

One of the biggest mechanisms that contributes to aging and many diseases is oxidative damage. This oxidative damage happens within our cells and involves free radicals (highly reactive molecules that have unpaired electrons). Antioxidants are substances that inhibit oxidation, especially one used to counteract the deterioration of stored food products. Curumin happens to be a potent antioxidant that works to neutralize free radicals. In addition to fighting against free radicals, curcmin also boosts the activity of the body's own antioxidant enzymes.

3) Can Help Prevent Cancer

Curcumin derived from turmeric has shown to interfere with multiple cell signaling pathways that slow or reduce the growth of new cancerous cells or blood vessels in tumers. Researches have been studying how curcumin can affect the cancer growth and development at the molecular level. Although there has been limited studies conducted thus far whether or not high-dose curcumin could help treat cancer in humans, there is evidence linking preventative measures using curcmin against colorectal cancer. In one study in 44 men with lesions in the colon that sometimes turn cancerous, 4 grams of curcumin per day for 30 days reduced the number of lesions by 40%. Turmeric works well to help naturally treat cancer and could be especially effective at treating breast, colon, and skin cancer.

4) Helpful for Arthritis

Since curcumin is a powerful anti-inlammatory and pain-reducing compound, it has been studied in rheumatoid arthritis patients and the results of a multi-group study were published in 2012. Of three groups tested: curcumin treated, Dicolfenac sodium (an arthritis drug) treated, and a combination of the two, the curcumin group showed the highest percentage of improvement in overall scores. 

5) Protects the Heart

Did you know that heart disease is one of the biggest killer in the world? The curcumin found in turmeric may help reverse steps in the heart disease process. Curcumin's main benefit when it comes to the heart is improving the function of the endothelium, which is the lining of the blood vessels. Dysfunction in the endothelium layer is a major driver in heart disease and can cause an irregularity in blood pressure and blood clotting. Several studies suggest that curcumin leads to improvements in endothelial function. In addition, the potent anti-inflammatory and antioxidant components of curcumin greatly benefit heart health.

Turmeric + Black Pepper

If you are familiar with turmeric supplements or done prior research, you're familiar with the recommendation to take turmeric with black pepper. Black pepper contains piperine, which has been shown to dramatically increase the absorption and effects of turmeric. 

So if you are cooking with turmeric or curry spice make sure to season in some black pepper as well. And if, after speaking with your health care professional, you're considering taking turmeric supplements I highly recommend finding one that also contains piperine for maximum benefits. Please remember that turmeric is generally considered safe for use in medicinal amounts, but it is important to talk to a doctor before using this or any substance medicinally as it can interact with several medications.

Practical Uses for Turmeric

1) Turmeric Tea (aka Golden Milk)

     *I recommend trying this recipe from Wellness Mama

b3-2017-Recipe-Index-Smoothie-Golden-Milk.jpg

2) Add 1/2-1 teaspoon turmeric into smoothies for a bright tropical orange

     *experiment with pineapple, orange, lemon, ginger and nut milks

3) Season roasted vegetables with turmeric

     *try my Roasted Turmeric Carrots for a healthy side dish. I personally like adding these cold to my salads throughout the week

I recommend purchasing organic ground turmeric that is bright yellow/orange in color and has no added ingredients. Let me know if this article was helpful and maybe inspired you to incorporate more ground turmeric into your cooking and/or drinks!

Resources:

1. Cancer Lett. 2008 Aug 18;267(1):133-64. doi: 10.1016/j.canlet.2008.03.025. Epub 2008 May 6.

2. http://cancerpreventionresearch.aacrjournals.org/content/4/3/354.long 

3. https://wellnessmama.com/5297/turmeric-uses/

4. https://draxe.com/turmeric-benefits/

5. http://www.healthline.com/nutrition/top-10-evidence-based-health-benefits-of-turmeric

6. Nutr Res. 2012 Oct;32(10):795-9. doi: 10.1016/j.nutres.2012.09.002. Epub 2012 Oct 15.

7. Drugs R D. 2008;9(4):243-50.

8. http://www.balancemebeautiful.com/health-benefits-of-turmeric/


Antinutrients - Should I Be Concerned?

WHAT ARE ANTINUTRIENTS EXACTLY?

Antinutrients are natural or synthetic compounds found in food, especially grains, beans, legumes, and nuts, that interfere with the absorption of certain vitamins, minerals, and other nutrients. An antinutrient's major role is to protect their natural “home”  (plant, root, or seed they inhabit). They are designed to repel pests, bugs, and other predators from eating the plant. Since plants don’t have legs and cannot run away from predators, they have a defense mechanism to ensure they can continue to grow and thrive. So in theory, antinutrients are a good thing; well, that is if you are a plant! But as we will unpack throughout this article, the human body is a “predator” and cannot properly digest these antinutrients. The plant’s defense mechanism is to fight against the digestive system and block the ability to fully breakdown food into it’s proper amino acids and nutrients. Antinutrients get their name from affecting the natural mechanisms of nutrient absorption. As you will learn below, eating large quantities of digestion-resistant foods (primarily grains) day after day can lead to inflammation and a weakened digestive system. The most common antinutrients include:

  1. Lectins
  2. Phytates (phytic acid)
  3. Tannins
  4. Oxalates (oxalic acid)
  5. Saponins

Although it may appear that antinutrients are a bad thing, under some circumstances they do have some health benefits. This is why they are so controversial. So how is one to know what antinutrients to avoid and which ones to consume? Let’s dive into each antinutrient and determine if it’s worth investing in!

1. Lectins

Lectins are carbohydrate-binding proteins found in all food plants, especially seeds, legumes and grains. Frequent consumption of these proteins can be harmful and damaging to the digestive system. They can stick to the cells in the lining of the small intestine and alter the texture. When over-consumed, grains and legumes (all beans, soy, and peanuts) can make digestion quite difficult. Although, all foods contain lectins, only about 30% contain significant amounts. Grains and legumes contain the most, followed by dairy, seafood, and nightshade plants (peppers, tomatoes, eggplant, and potatoes). When we consume grains and legumes we are actually eating the seed of the plant; this equates to eating hundreds, if not thousands, of seeds! Uncooked legumes are the largest source of lectins. I’ll be discussing how to properly prepare legumes in order to greatly reduce antinutrient levels towards the end of this article.

Conclusion: Concentrated amounts of lectins can cause damage to the intestinal wall and make digestion difficult. I recommend eating grains, beans, and other legumes in moderation, and if you have known digestive complications try to avoid them as much as possible. Dairy and nightshade vegetables have lesser amounts of lectins and only need to be tested for sensitivity in those with digestive complications, autoimmune disease, or other health complications relating to nutrient absorption.

2. Phytates

Phytates, also referred to as phytic acid, are indigestible, mineral-binding compounds found in grains, legumes, nuts, and seeds. Phytic acid is the most well-known antinutrient; it can prohibit phosphorus, calcium, copper, iron, magnesium, and zinc from being properly absorbed in our bodies. This is a big deal, as minerals are key players in every cellular function. Mineral deficiencies can result in a lot of symptoms from fatigue, muscle cramps, PMS, PCOS, constipation, asthma, migraines, and hormonal imbalances. Although phytates are found in all grains, legumes, seeds, and nuts they are not as high in seeds and nuts because the hard outer shell is removed prior to consuming; this shell is where the highest concentration of phytates reside as it is the plan’s first barrier. You may wonder why cows, sheep, goats, and buffalo can eat a grain based diet? It's because they are ruminant animals that possess phytase (the enzyme responsible for the breakdown of phytates). Despite the clear drawbacks to phytates there is some evidence that phytates may be protective against kidney stones and breast/prostate cancer. When phytic acid binds minerals in the gut, it can prevent the formation of free radicals, thus making it an antioxidant.

Source: Schlemmer U, et al. Phytate in foods and significance for humans: Food sources, intake, processing, bioavailability, protective role and analysis. Mol Nutr Food res 2009;53:S330-S375.

Source: Schlemmer U, et al. Phytate in foods and significance for humans: Food sources, intake, processing, bioavailability, protective role and analysis. Mol Nutr Food res 2009;53:S330-S375.

Source: Schlemmer U, et al. Phytate in foods and significance for humans: Food sources, intake, processing, bioavailability, protective role and analysis. Mol Nutr Food res 2009;53:S330-S375.

Source: Schlemmer U, et al. Phytate in foods and significance for humans: Food sources, intake, processing, bioavailability, protective role and analysis. Mol Nutr Food res 2009;53:S330-S375.

Conclusion: In comparison to other whole foods like vegetables and meat, foods that contain phytates can lead to malabsorption of certain key minerals. For example, calcium eaten with 100 calories of grain is likely to lead to a 7.6 mg rate of absorption, while calcium absorption eaten with 100 calories of vegetables is around 116 mg (Dr. Loren Cordian, The Paleo Answer). If you are generally healthy, eat a balanced diet, and consume grains, legumes, seeds, and nuts in moderation, phytic acid’s effect on mineral deficiencies should not be a major concern. The problem lies in consuming large amounts of phytates with little vegetable and meat consumption. My suggestion is to eat grains, legumes, seeds, and nuts in moderation if you are healthy and have no underlying deficiencies.

3. Tannins

These are a type of enzyme inhibitor that may impair the digestion of various nutrients. Since we need enzymes to properly digest foods and transport nutrients to our cells, molecules that inhibit enzymes from doing their job can cause bloating, diarrhea, constipation, and other digestive issues. In addition, their capability to bind and shrink enzymes is what causes the puckery and dry feeling in the mouth after consuming foods rich in tannins. During my research, I found that coffee, teas, red wine, grapes, pomegranates, berries, barley, nuts, chocolate, rhubarb, squash, and legumes all contain tannins. As with phytates, tannins have some possible benefits. They have been reported to reduce the mutagenicity of a number of mutagens and have some anti-carcinogenic activity. But from my research, there have been few studies on this effect on humans. Consuming foods rich in vitamin C can help neutralize the effects on tannin on iron absorption.

Conclusion: Consuming large quantities of tannins may result in negative health effects, specifically to the digestive tract; however in small quantities they may be beneficial to human health. My suggestion: don’t eat a quart of blueberries in one sitting!

4) Oxylates

Oxylate is an organic acid found in most plants (leafy greens, vegetables, fruits, cocoa, nuts and seeds). After consumption, oxalate can bind to minerals to form calcium oxalate and iron oxalate. For most people, these compounds are eliminated in the stool or urine, but for sensitive individuals high-oxalate diets can lead to an increased risk of kidney stones or other health problems. As with other antinutrients, the main concern is prohibiting mineral absorption. It is of particular concern, when minerals like calcium are eaten with fiber which can further prevents absorption.

Conclusion: Most healthy people can consume oxalate-rich foods without any problem, but those with poor gut health may need to limit their intake. Individuals with IBS (Irritable Bowel Syndrome) or IBD (Irritable Bowel Disease) have an increased risk for developing kidney stones. For those with digestive concerns, drink plenty of water and make sure to get enough calcium (well-sourced dairy, bok choy, broccoli, etc.), which will bind oxalate in the gut and reduce the amount the body absorbs.

5) Saponins

These compounds are similar to lectins. Saponins can create pores in the cell membrane. Some experts believe they may increase intestinal permeability, also known as “leaky gut”, which can lead to a range of health problems. Interestingly, saponins can stimulate an immune response from within our cells which can then up-regulate antibody production. This can be problematic as the body can launch an immune attack on undigested food particles that may enter in our blood stream. Saponins are found in a variety of plant sources (beans, peanuts, soy), nightshade vegetables, and seeds (quinoa and sesame). In addition, they are found in Yuccaschidigera (a commercial source) that is used in beverages to produce a foamy head, and extensively in lipstick and shampoo for is emulsion properties. Saponins are known for their ability to create foam in water and behave like a detergent. I do want to note that some saponins have shown to exhibit anti-inflammatory and immune-stimulation characteristics, as well as antimicrobial properties towards some fungi and bacteria. But once again, more studies need to be conducted in order to conclude any health benefits to humans. 

Conclusion: More research is needed to conclude whether saponins are truly harmful to the gut. For now, it is wise to play it safe and eat saponins in moderation or limit consumption due to their known ability to increase permeability in the small intestines.

WHAT STEPS CAN YOU TAKE TO REDUCE THE EFFECTS OF ANTINUTRIENTS & OBTAIN THE OTHER BENEFITS OF PLANT FOODS?

You have probably noticed that most foods containing antinutrients also have positive health benefits and overall are healthier than eating processed foods (except modern, processed grain products like wheat, soy, and corn). So how can you best enjoy these foods if you are an average, healthy person? The answer: soaking, sprouting, and fermenting grains, beans, nuts, and seeds!

It is best to purchase sprouted or fermented grains (properly sprouted grains like quinoa or true sourdough bread). Some of my favorite bread brands are Angelic Bakehouse and Food for Life; although I personally don’t consume gluten often so I like the gluten-free versions. Fermentation and sprouting of grains can help break down the antinutrients. Soaking dry beans and other legumes overnight can improve their nutritional value and decrease phytate, lectins, tannins, and calcium oxalate. I still advise limiting your consumption though, as some types of legumes (kidney and soy especially) are still high in enzyme inhibitors even after soaking. Sprouting and soaking legumes and grains has been used in traditional preparation methods for thousands of years by various cultures. It is the recent mass production and processing of grains the last century that has stripped the nutritional value from typical grains and legumes. Evidence shows that by using these methods, grains’ nutrients are more bioavailable. If you choose to consume grains and legumes I suggest purchasing them organically and/or in bulk and sprouting them yourself to ensure the least amount of processing or chemical alteration. And as stated previously, make sure the remainder of your diet is varied with a lot of vegetables. And if you are susceptible to gut or digestive problems, limit or avoid grains and legumes all together in order to best reduce any negative digestive symptoms. To learn how to properly sprout beans check out the website Sprout People.

Overall, the benefit of eating antinutrients is overshadowed by their harmful properties, and proper preparation of grains and legumes can take an extreme amount of time. If a substance may be harmful to you when consumed, and there are no negative side effects of removing it, it may logically make sense to avoid it all together. I also want to make sure to note that organic white rice (jasmine and basmati) is white because the grain has been stripped of the bran, which removes almost all of the phytic acid, making white rice more digestible.  While white rice is still a grain, it is a safer option for those with digestive distress.